This post contains affiliate links. As an Amazon Associate we earn from qualifying purchases, at no extra cost to you. Read our disclosure.
Safety first: Always supervise little ones, and skip small parts for kids who still put things in their mouths. Please read our play safety notes before you start.
Key takeaways
- Ages 1 and 2: contact paper, dot markers, sponge stamps and handprints. Ages 3 to 4: torn paper, cupcake liners, pinecones. Ages 5 and up: craft sticks and wooden trees.
- Every craft lists ages, prep time, mess level, drying time, supplies and a safety note.
- Tape the paper down and set a wet cloth within reach before the paint comes out.
- Skip hot glue for kids. Tacky glue holds paper, wood and felt without a burn risk.
- Pom poms, beads and sequins are choking hazards under 3, so none of the toddler trees use them.
In this post26 sections
- Christmas Tree Crafts by Age at a Glance
- Easy Christmas Tree Crafts for Ages 1 and 2 (Sticky, Dot and Sponge)
- 1. Contact paper sticky tree
- 2. Dot marker tree
- 3. Sponge stamp stacked tree
- 4. Tape-resist tree
- Handprint and Fingerprint Christmas Tree Crafts (Ages 1 to 6)
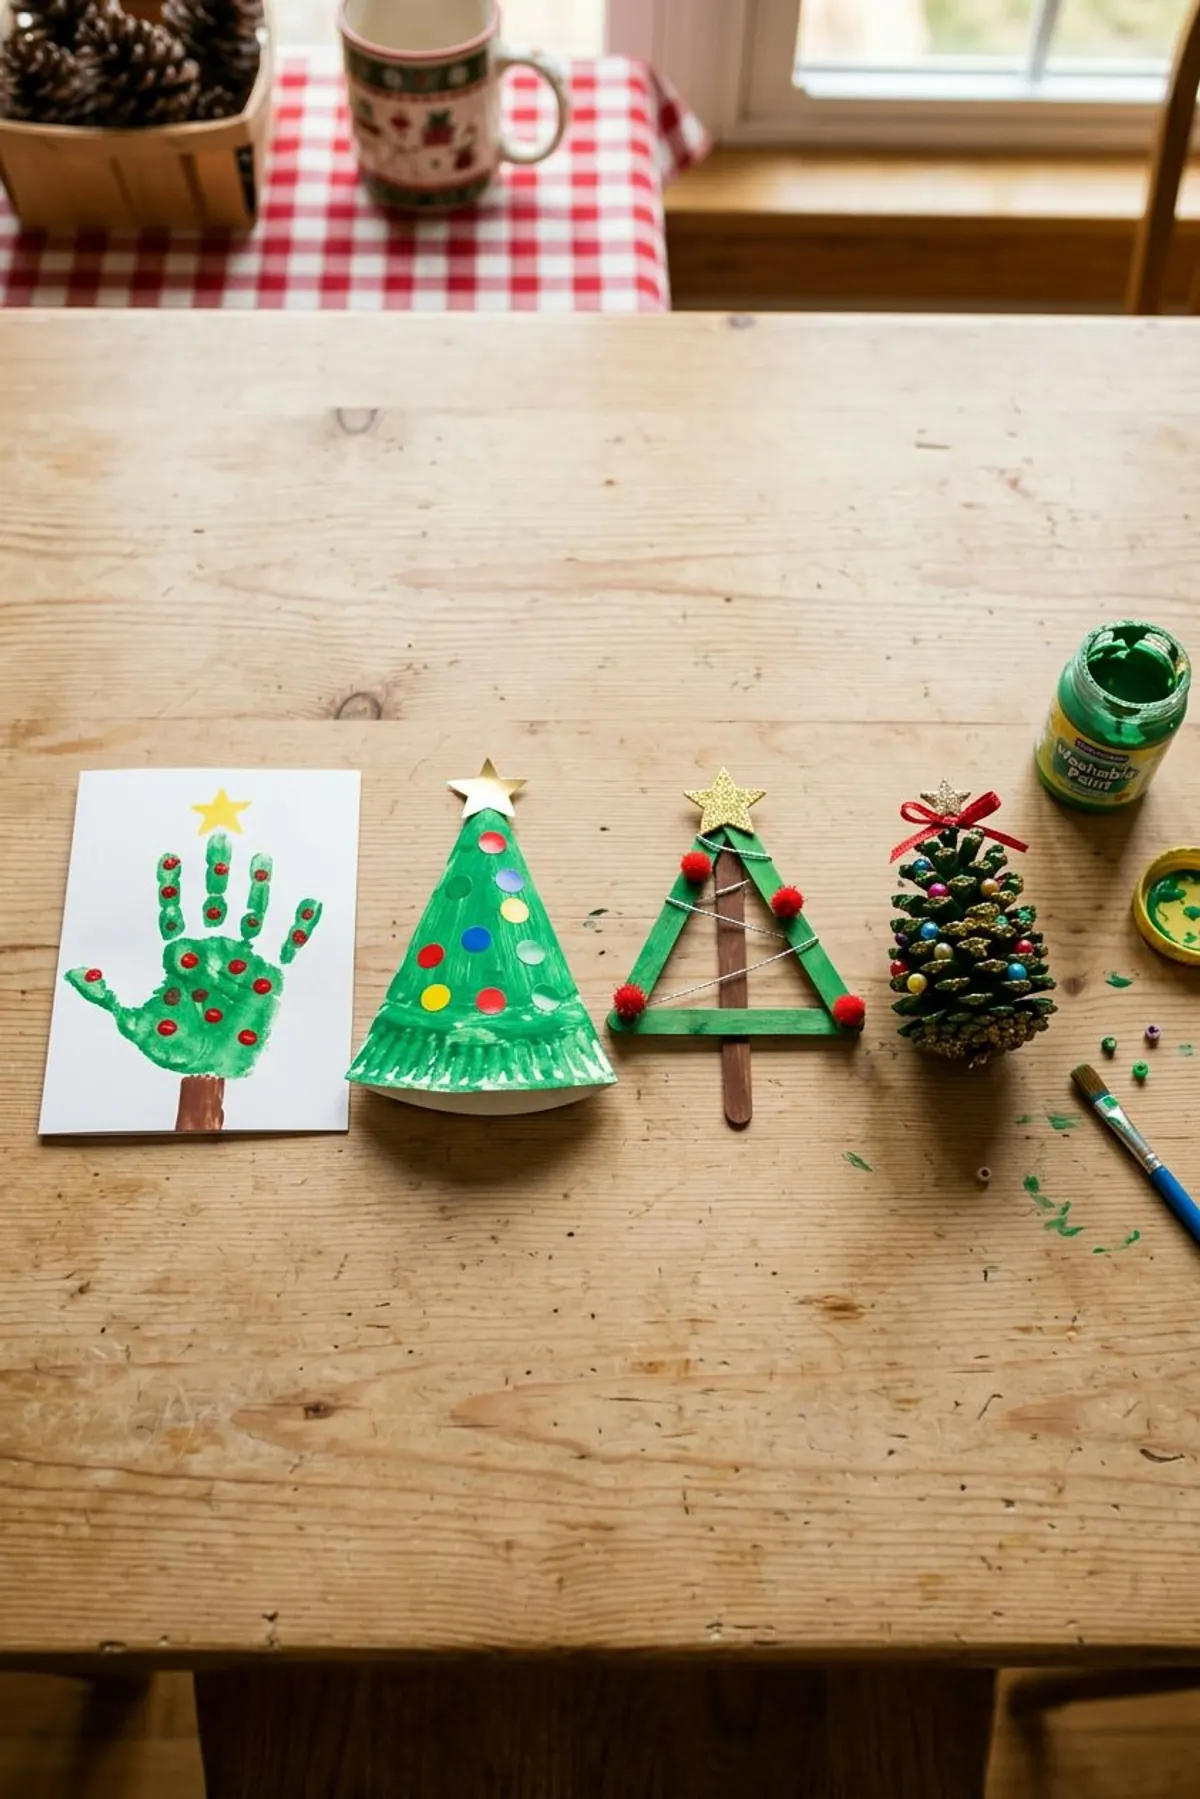
- 5. Painted handprint tree
- 6. Cut-out handprint tree
- 7. Fingerprint ornament tree
- 8. Handprint tree card for grandparents
- Paper and Paper Plate Christmas Tree Crafts (Ages 3 to 6)
- 9. Torn paper plate tree
- 10. Paper plate cone tree
- 11. Paper strip tree
- 12. Cupcake liner tree
- 13. Coffee filter tree
- Pinecone, Wood and Nature Christmas Tree Crafts (Ages 3 to 6)
- 14. Painted pinecone tree
- 15. Craft stick tree
- 16. Painted wooden tree cutout
- 17. Twig tree on cardboard
- 18. Evergreen sprig print tree
- What Most Tree Craft Pages Skip: Full Supply Lists, Drying Times and Glue Safety
- Supplies for These Christmas Tree Crafts
- FAQ
Christmas Tree Crafts by Age at a Glance
A tree is a triangle, so almost any craft supply can make one. The skill you need changes by age, not the shape. Use this table to pick a craft your child can finish, then jump to the section that matches.
| Age | Good picks | Hold off on |
|---|---|---|
| 1 to 2 years | Contact paper tree, dot marker tree, sponge stamp tree, painted handprint, fingerprint ornaments | Pom poms, beads, sequins, scissors, hot glue |
| 3 to 4 years | Torn paper plate tree, cupcake liner tree, paper strip tree, coffee filter tree, painted pinecone, twig tree, evergreen print | Cutting curves, staplers, hot glue |
| 5 to 6 years | Craft stick tree, painted wooden tree, cut-out handprint tree, plate cone tree with a grown-up cutting | Hot glue without an adult |
Easy Christmas Tree Crafts for Ages 1 and 2 (Sticky, Dot and Sponge)
At 1 and 2, a tree craft is about pressing and dabbing, not about a neat result. Tape the paper down, keep the pieces big and offer two colors. Everything in this section uses supplies bigger than a toilet paper tube is wide, so nothing small ends up in a mouth.
1Contact paper sticky tree
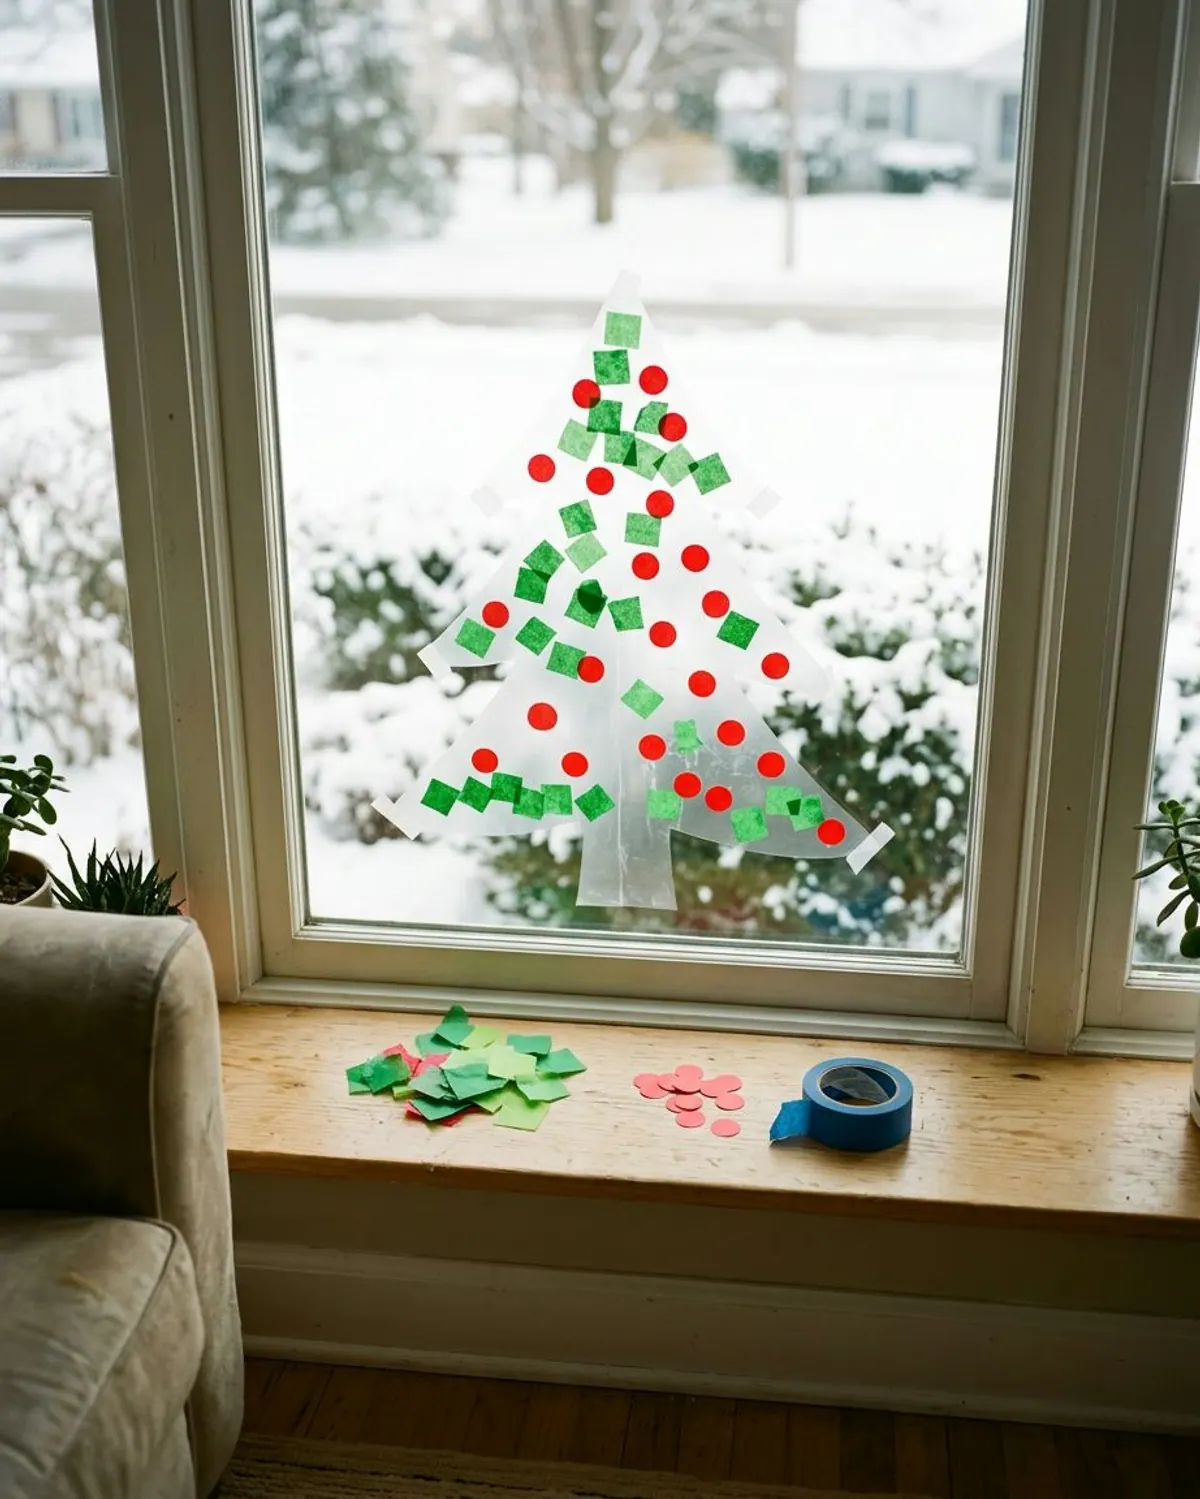
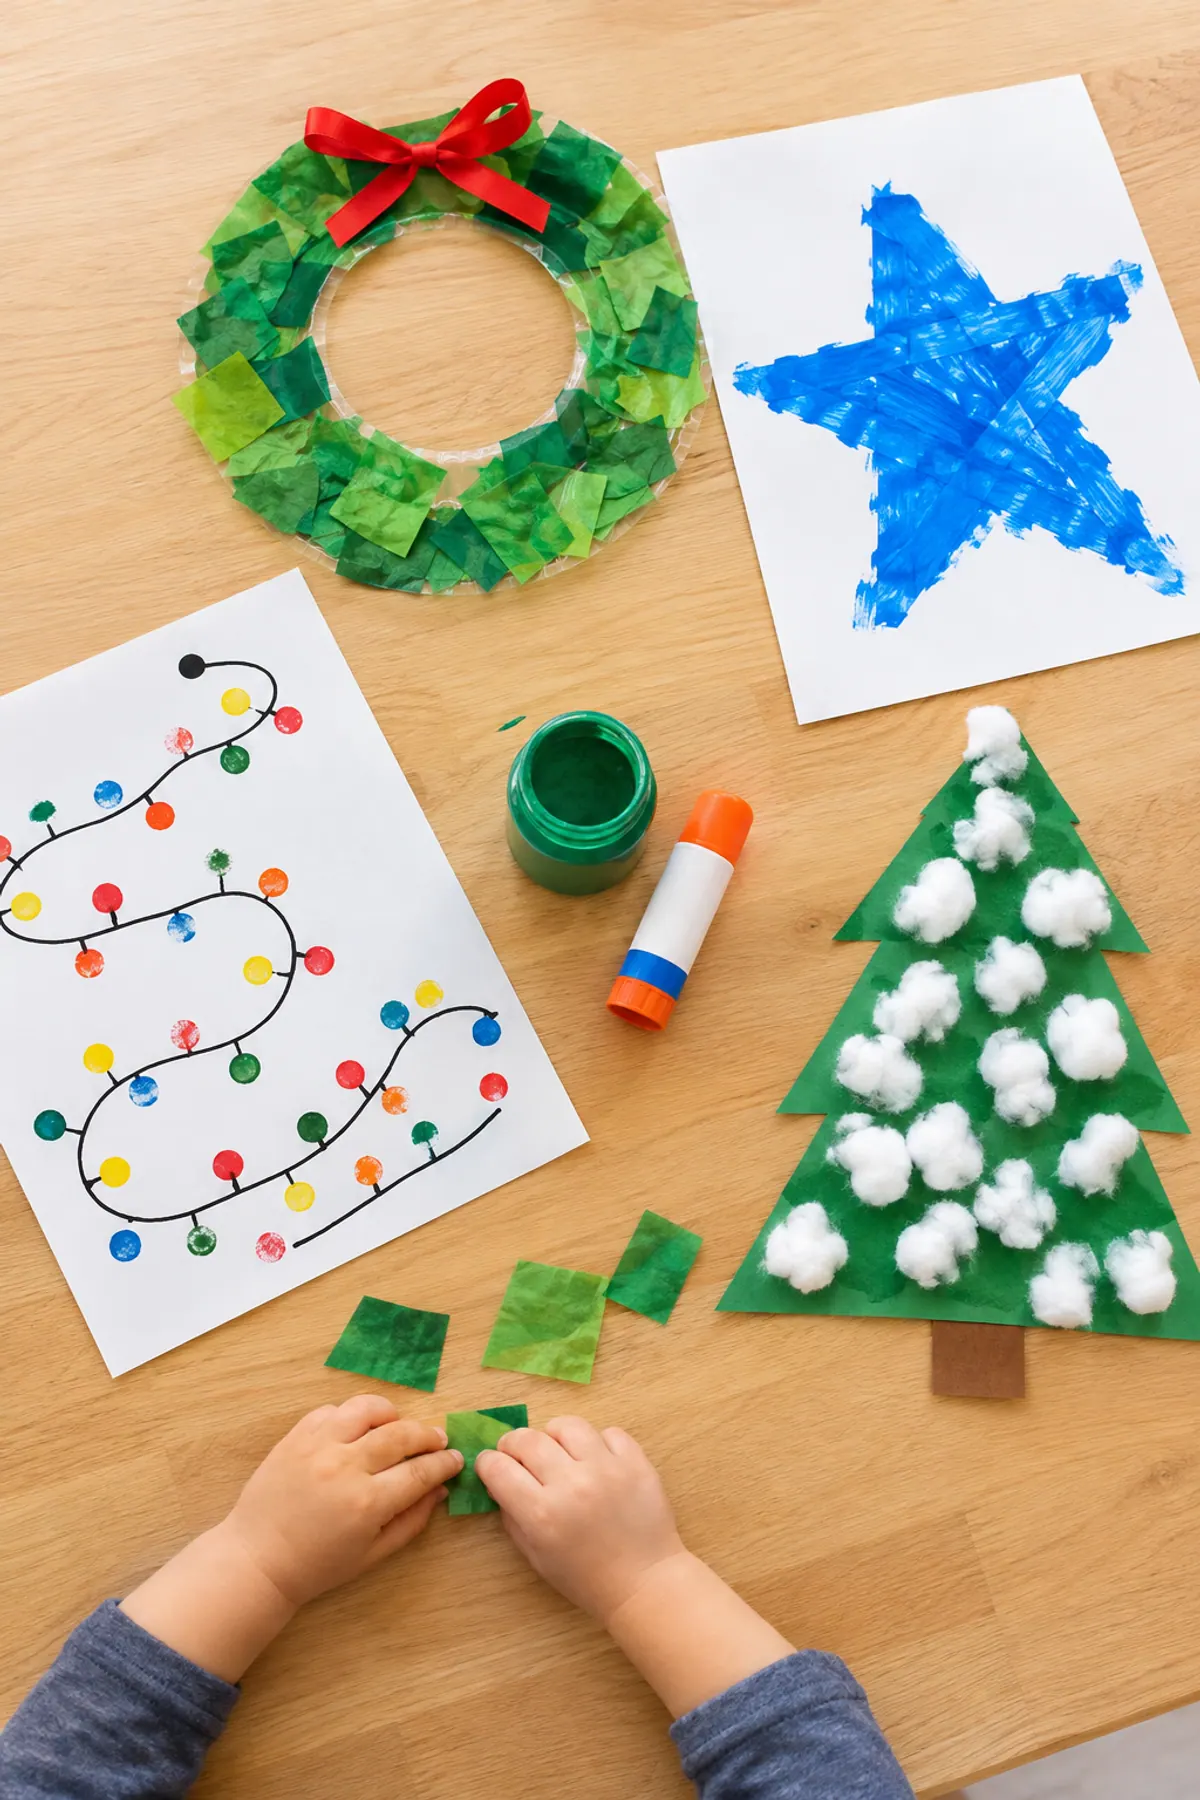
Cut a tree shape from clear contact paper, peel the backing and tape it sticky side out on a low window or the table. Hand over big squares of green tissue paper and a few red paper circles, and your child presses them on. There is no glue, no drying and no brush to wash, and the finished tree glows when daylight comes through. It also stays put, so a toddler can add pieces for a few minutes, walk away and come back to the same tree later in the day.
Ages: 1 and up.
Prep: 5 minutes.
Mess: none.
Drying: none.
Supplies: clear contact paper, green and red tissue paper, painter's tape.
Safety: adult cuts the tree. Keep the sticky side low and away from hair, and drop any tissue that gets wet.
- Add a second sheet of contact paper on top and the tree lasts all month.
One roll makes the tree, a wreath and a few spare shapes.
2Dot marker tree
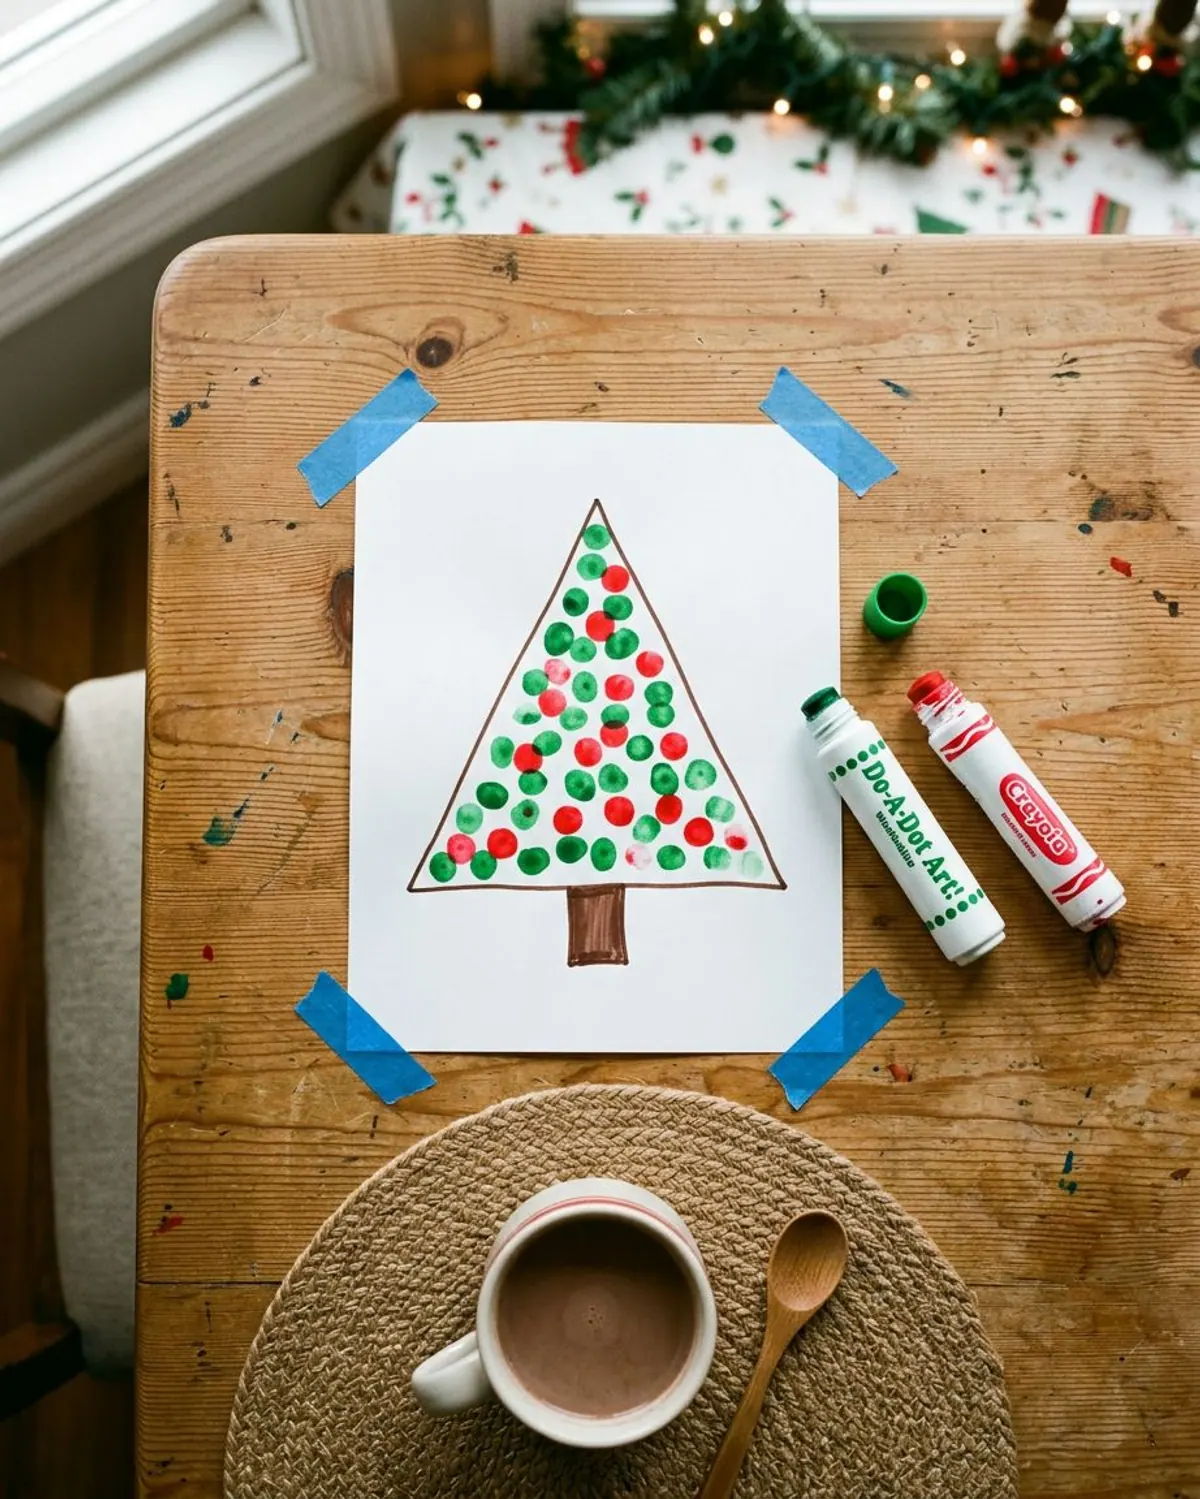
Draw a big tree outline on white paper and hand over two dot markers, one green and one red. Your child stamps dots anywhere on or near the tree, and the dots dry into bright lights and needles in minutes. It works well for a child who does not like wet paint on their hands. Because the markers are dabbed rather than brushed, there is no waiting for paint to run and no brush to wash, which makes this a good one for a busy afternoon.
Ages: 2 and up.
Prep: 2 minutes.
Mess: low.
Drying: none.
Supplies: white paper, washable dot markers, a marker for the outline.
Safety: washable markers only, and keep caps out of reach. Caps are a choking hazard under 3.
- Tape the page down first so the marker does not slide when pressed.
Chunky barrels are easy to grip and the dots wash off hands.
3Sponge stamp stacked tree
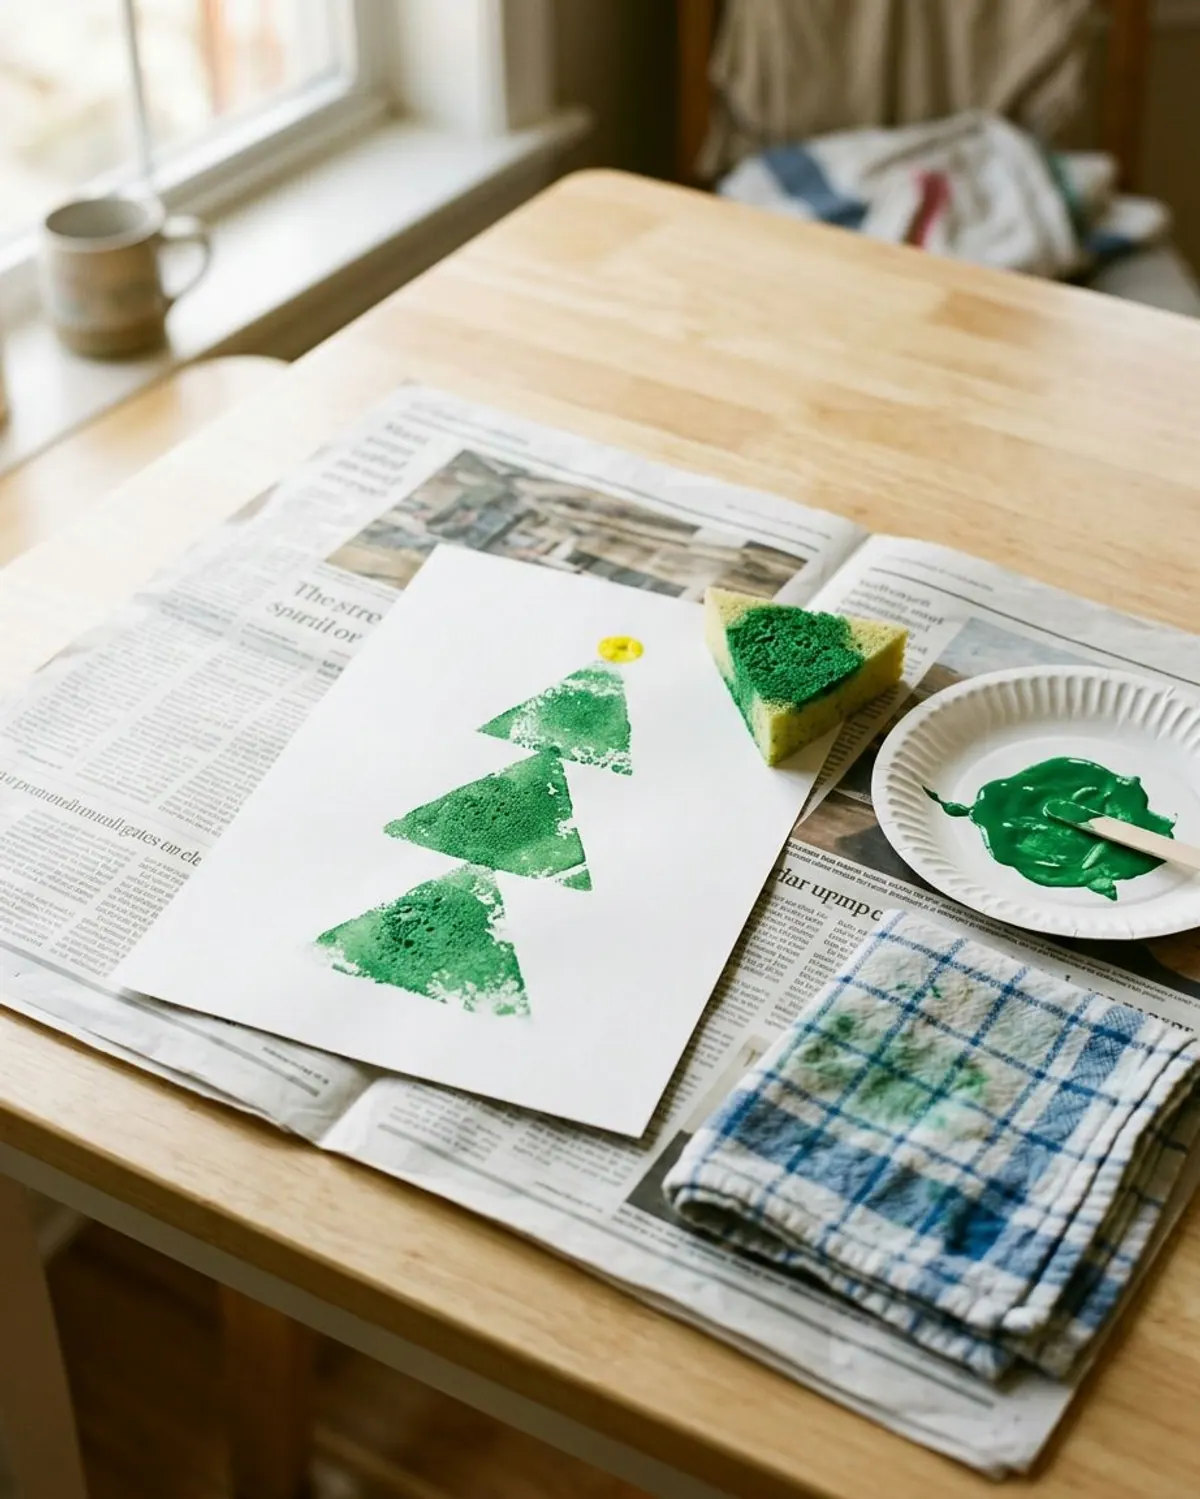
Cut a kitchen sponge into a triangle. Dip it in a shallow plate of green washable paint and press it on a page, once for the top and again lower for each layer. A second stamp in a darker green makes the branches. A yellow handprint star or a yellow dot finishes the top. The stamping rhythm of press, lift and move down is easy to repeat, so the tree builds itself in a few quick steps without drawing anything first.
Ages: 2 and up.
Prep: 5 minutes.
Mess: medium.
Drying: 1 hour.
Supplies: a kitchen sponge, washable green paint, a paper plate for the paint, white paper.
Safety: keep the sponge away from the mouth. Wash hands before snack time.
- Use a clothespin as a handle so fingers stay cleaner.
Green, red and yellow cover every paint tree in this list.
4Tape-resist tree
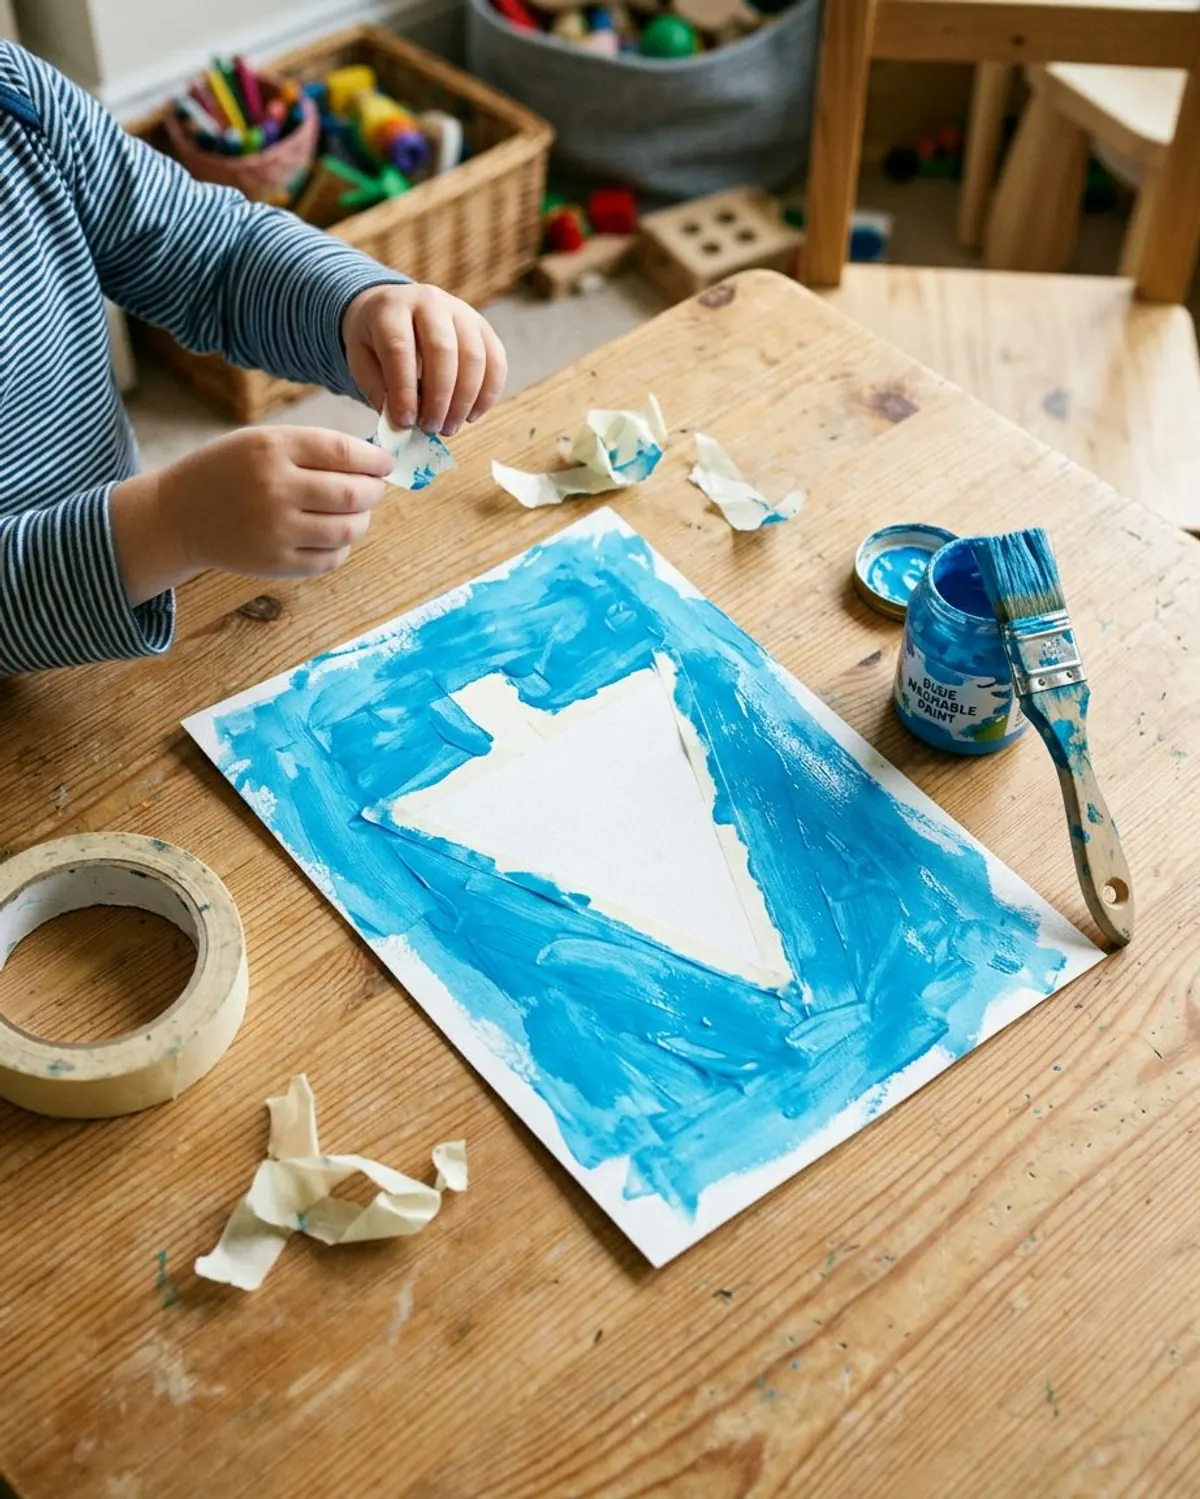
Press a tree shape of painter's tape onto white cardstock, smoothing the edges. Your child paints over the whole page with a chunky brush or a sponge in blue, green or purple. After it dries, you peel the tape and a crisp white tree is left behind, like a small bit of magic. The result looks neat even when the painting was messy, so it makes a good first craft for children who worry about getting the shape right.
Ages: 2 and up.
Prep: 5 minutes.
Mess: medium.
Drying: 1 hour, then peel.
Supplies: cardstock, painter's tape, washable paint, a chunky brush.
Safety: an adult peels the tape and keeps the paper corners tidy. Use washable paint only.
- Peel the tape while the paint is slightly damp for the cleanest edge.
Low-tack tape lifts off paper without tearing it.
Handprint and Fingerprint Christmas Tree Crafts (Ages 1 to 6)
Handprint trees are the craft families save, so make them early in the season. A child's hand is the stamp, which means the age range is wide. Tape the paper down, set a wet cloth beside you and plan on a bath afterward.
5Painted handprint tree
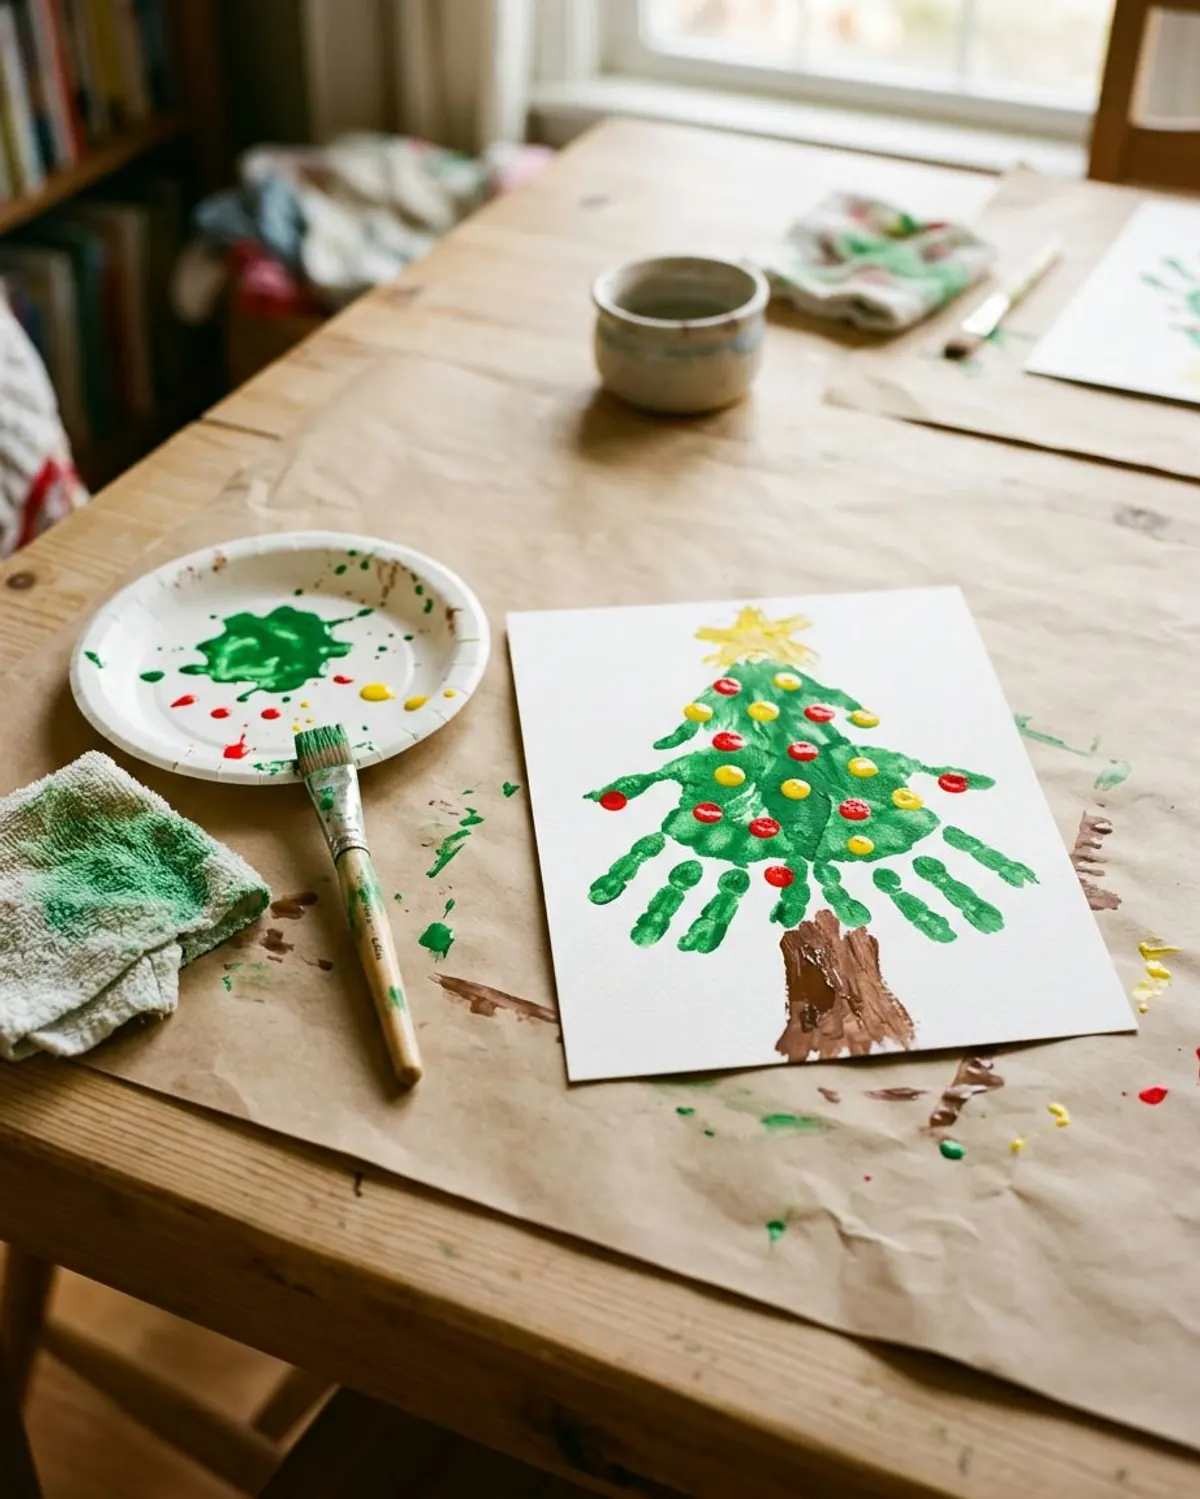
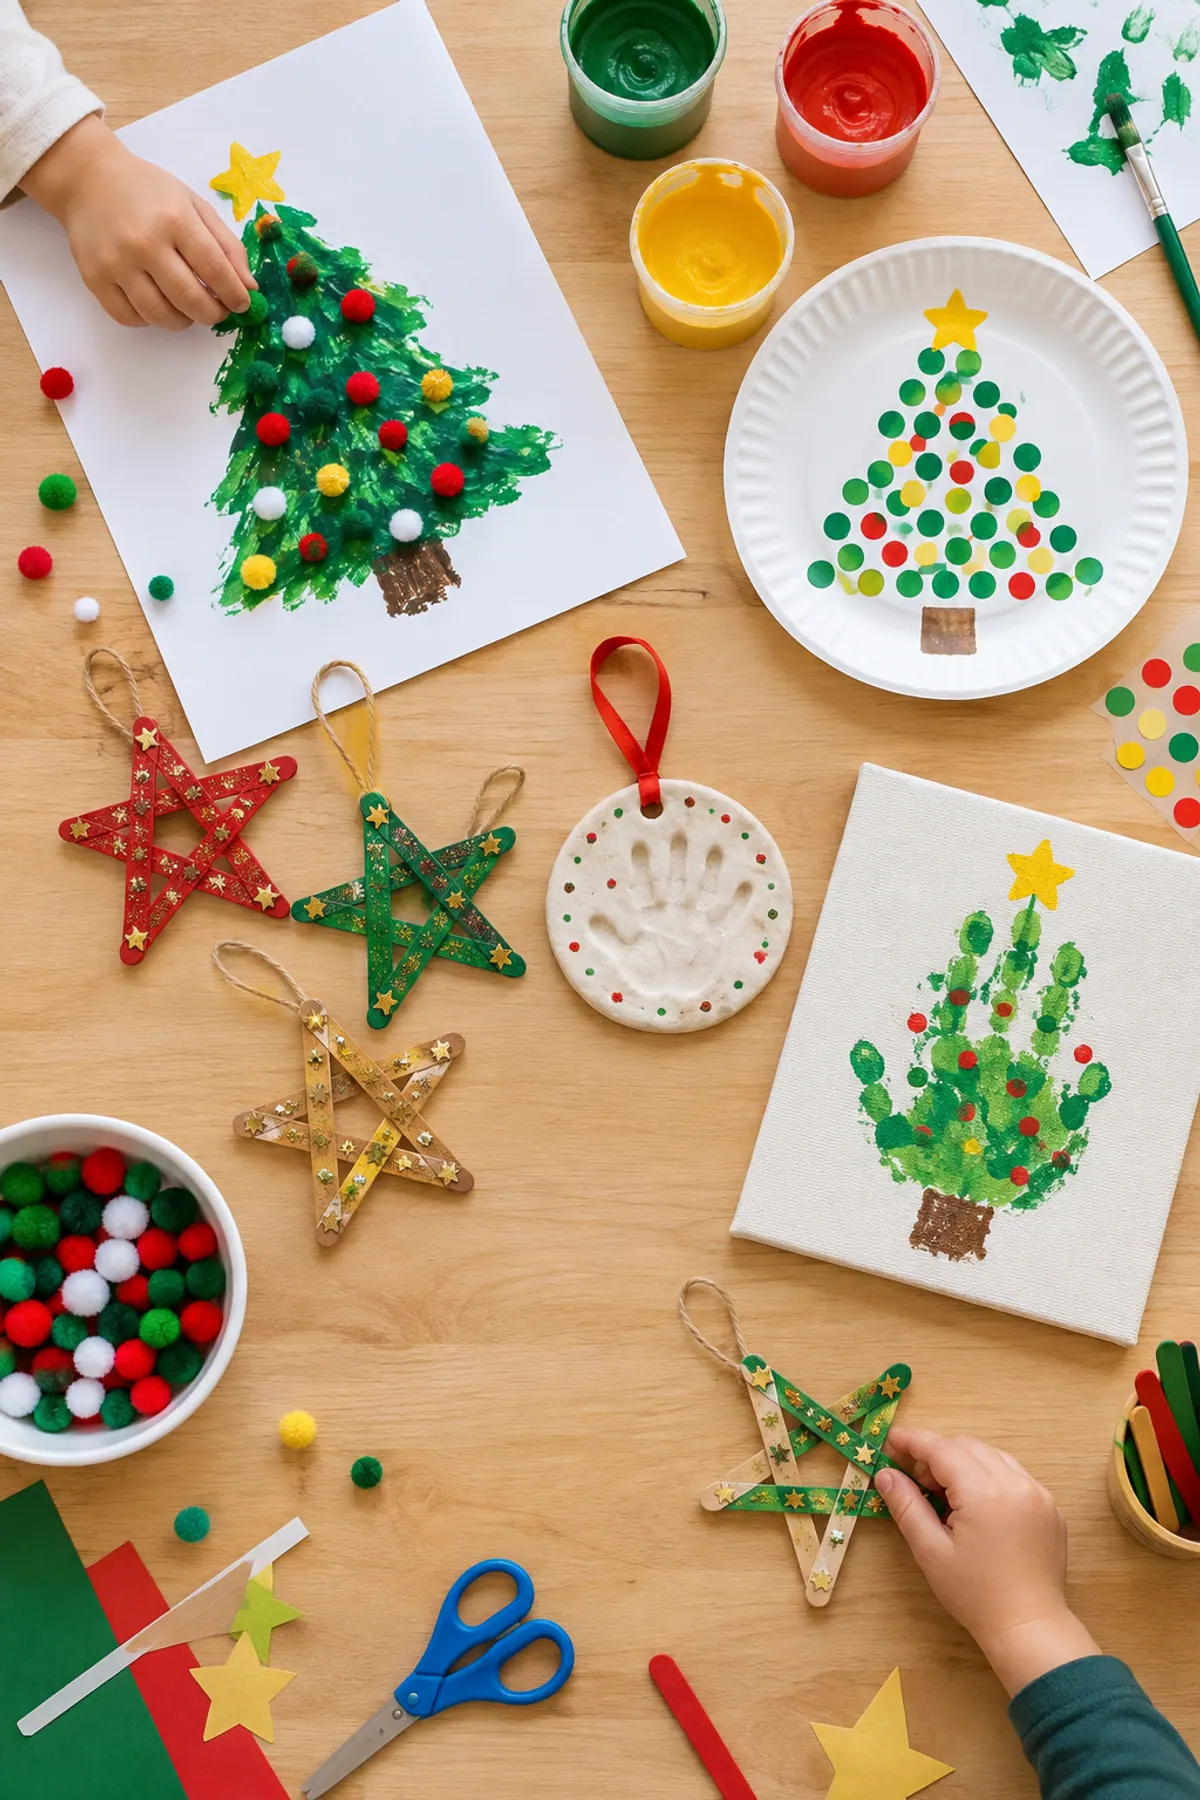
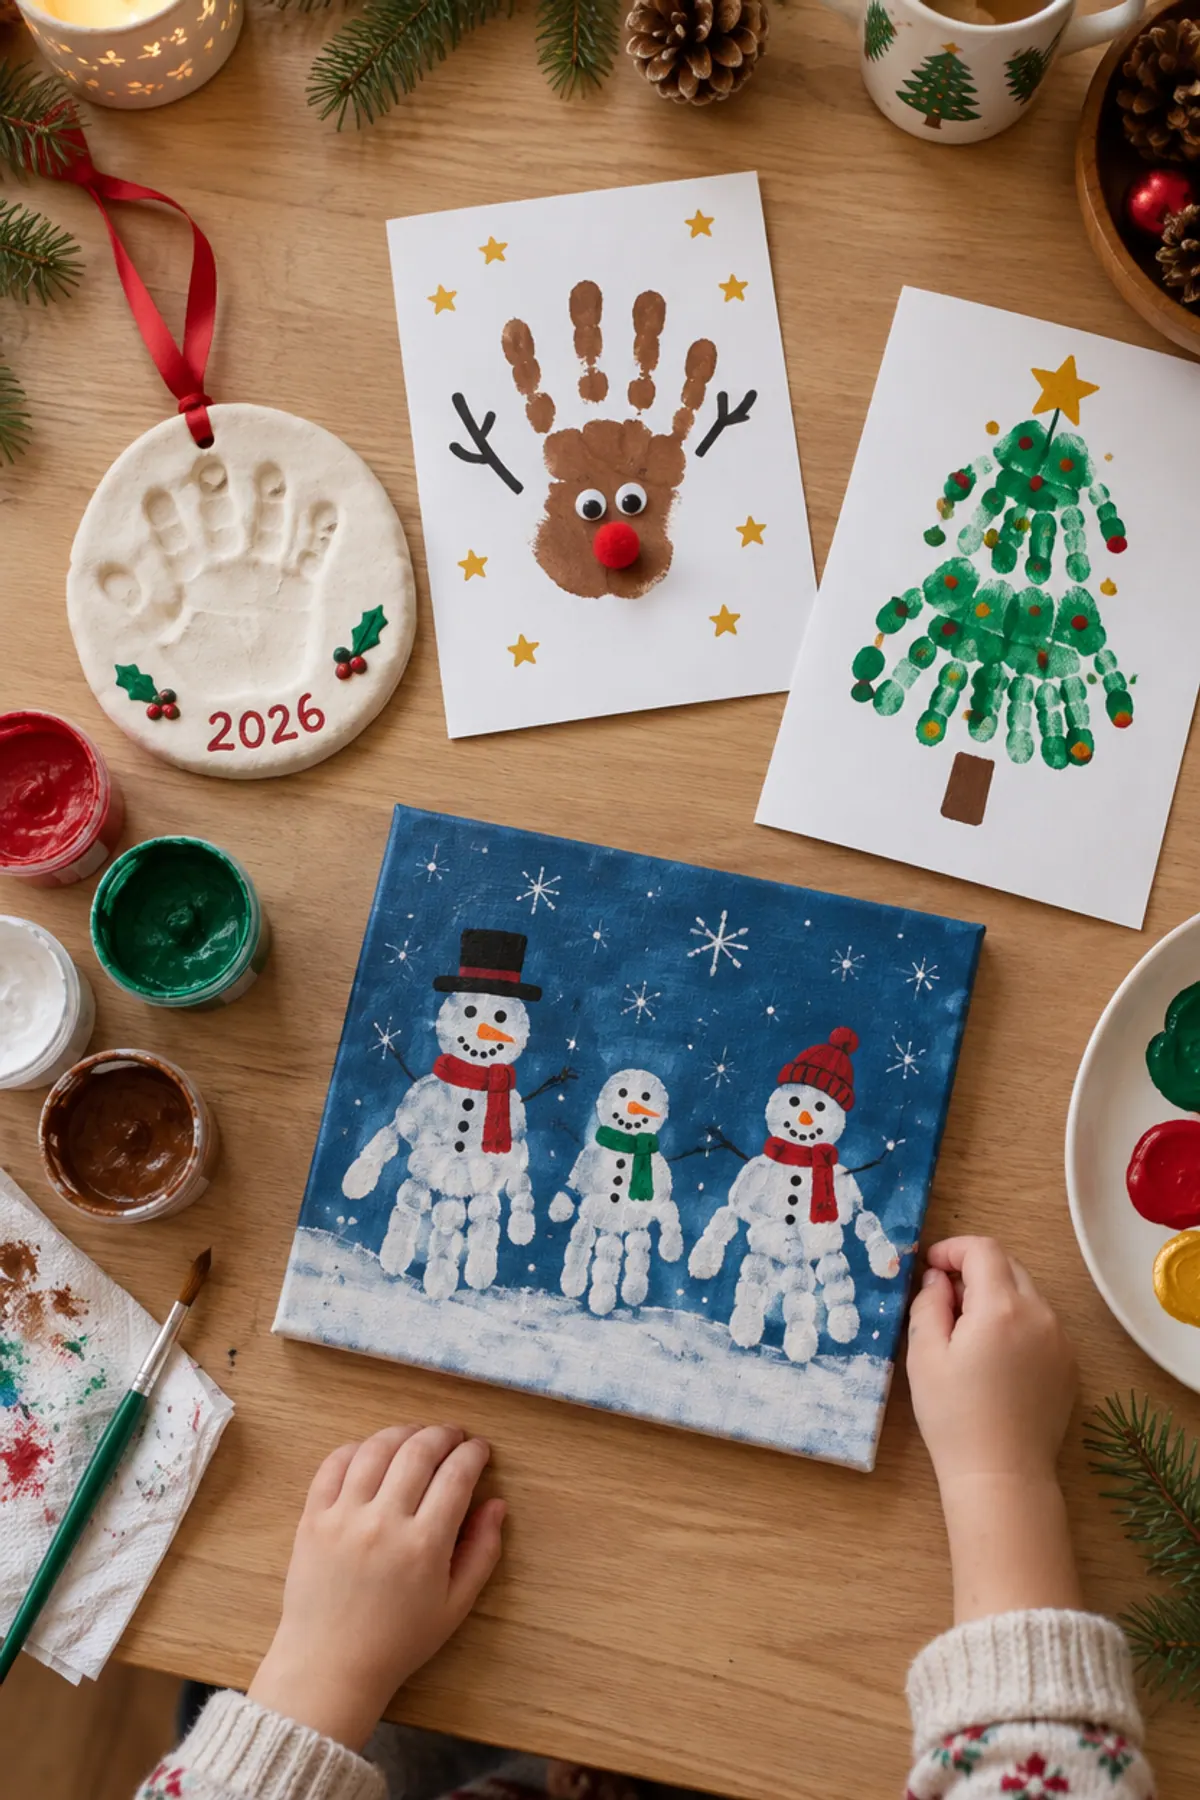
Brush washable green paint on your child's palm and fingers, then press the hand on cardstock with the fingers pointing down. The spread fingers make the branches. Paint a brown trunk, then add fingertip dots in red and yellow for ornaments once the green is dry. The tree is a keepsake as much as a craft, so write the date and your child's age in the corner.
Ages: 1 and up with a grown-up doing the painting.
Prep: 10 minutes.
Mess: high.
Drying: 1 hour, overnight if thick.
Supplies: cardstock, washable green, brown, red and yellow paint, wet wipes.
Safety: use paint labeled non-toxic and washable, and wipe hands before they reach the mouth.
- Press one hand, then a second slightly lower to fill out a bigger tree.
Thicker paint makes a clear print on the first press.
6Cut-out handprint tree
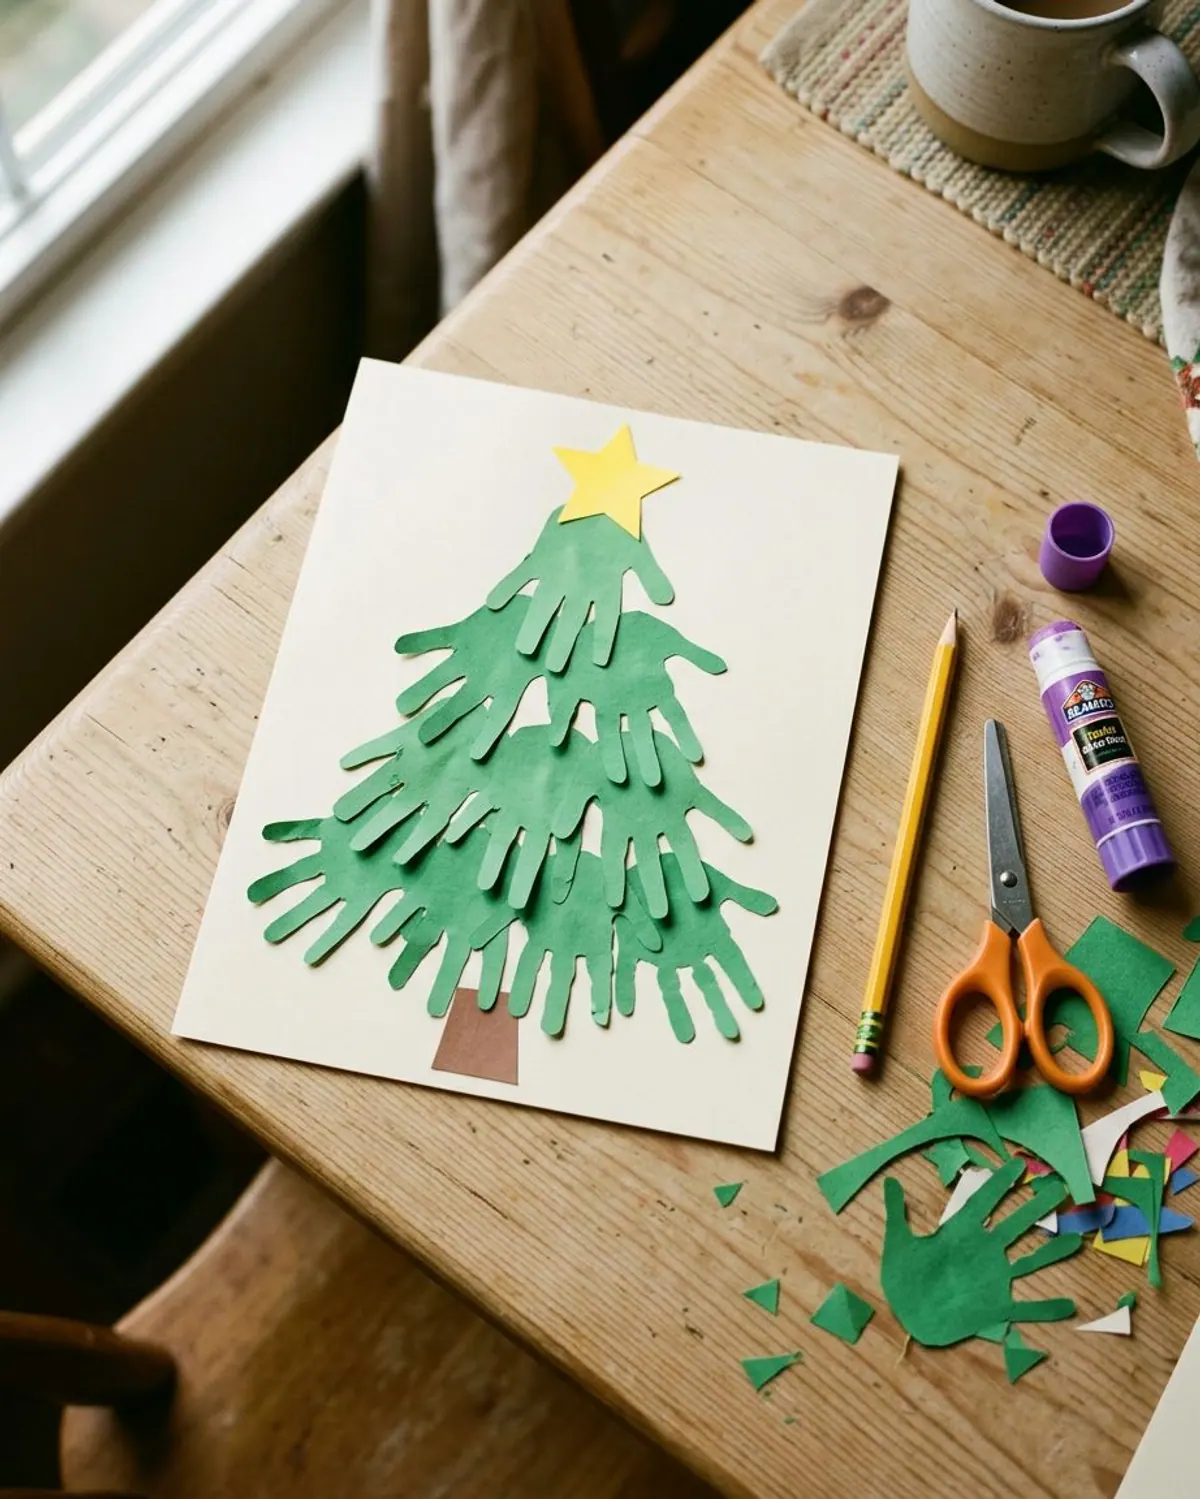
Trace your child's hand about 10 times on green paper and cut each one out, a method used on the All Kids Network handprint tree page (source). Glue the hands in rows with the biggest row at the bottom and the fingers pointing out. Finish with a paper star and a brown strip for the trunk. This one takes longer than most, but each cutout is an easy job, and the finished tree has a texture that paint alone cannot copy.
Ages: 3 and up to help with cutting; an adult cuts for ages 1 and 2.
Prep: 15 minutes.
Mess: low.
Drying: none.
Supplies: green paper, a pencil, child-safety scissors, glue stick, yellow paper.
Safety: adult cuts for kids under 4, or uses rounded-tip safety scissors with kids close by.
- Cut a few extras in case a handprint goes in the wrong spot.
Sturdy sheets that hold up to tracing and glue.
7Fingerprint ornament tree
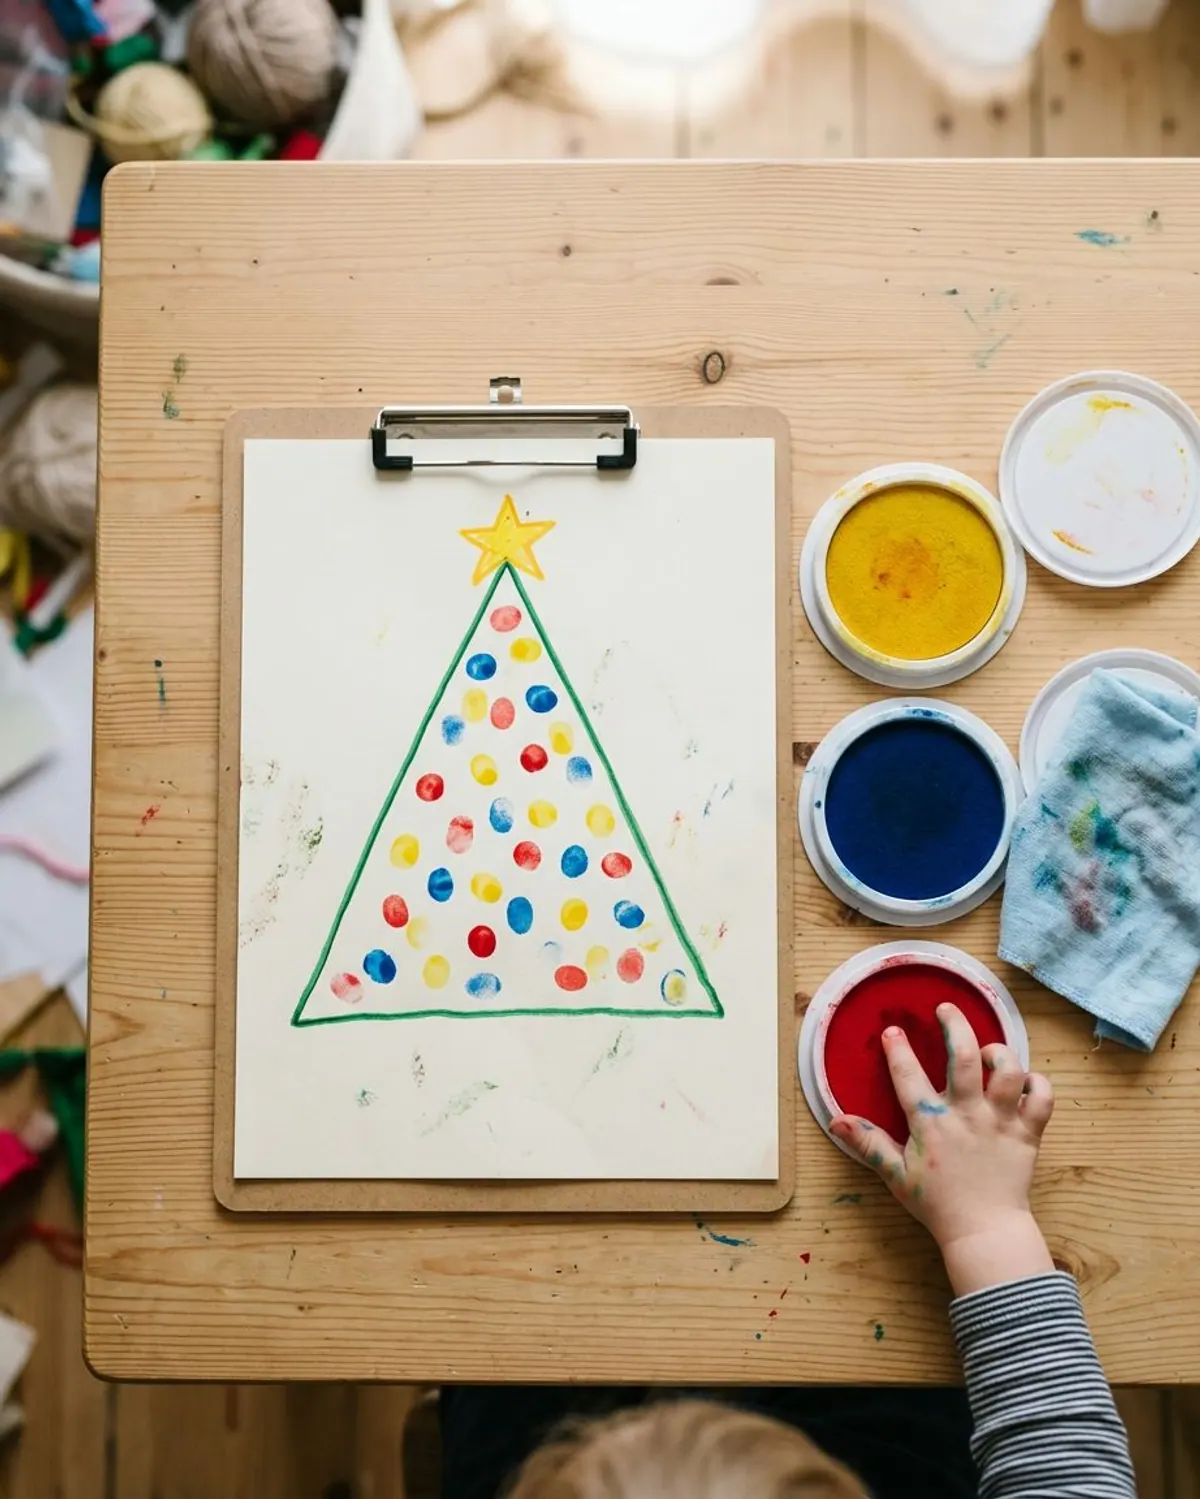
Draw a large tree on white paper. Your child dips a finger in a shallow plate of red, yellow and blue washable paint and presses dots for ornaments on the tree, or ink pads work for a neater mess. A grown-up can write the child's name and the year under the tree. The dots do not need to match anything, so there is no wrong way to do it, and a page of dots looks festive from across the room.
Ages: 1 and up.
Prep: 5 minutes.
Mess: medium.
Drying: 15 minutes.
Supplies: white paper, a tree outline in marker, washable paint or washable ink pads.
Safety: stay within arm's reach and wipe fingers between colors, since little fingers go to mouths.
- Draw the tree with a thick marker so it shows through the dots.
Small, mess-friendly stamps that wash off skin and most fabrics.
8Handprint tree card for grandparents
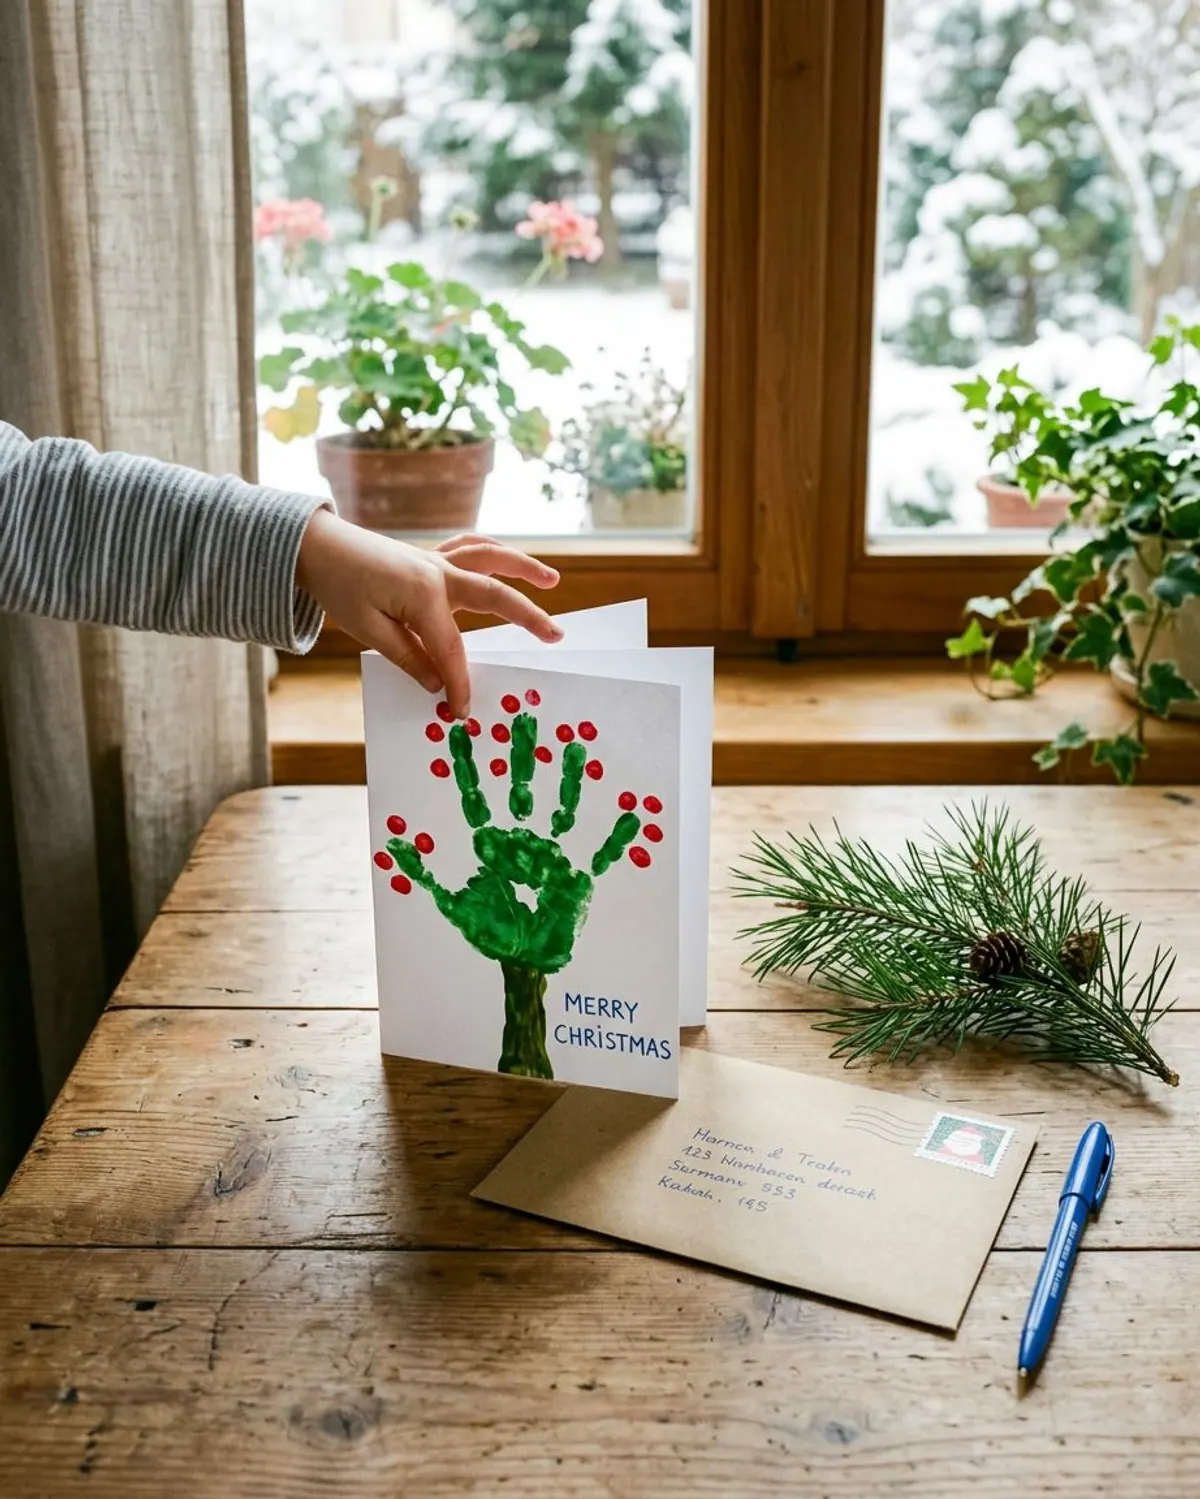
Fold a sheet of cardstock in half to make a card. Press a green handprint on the front with the fingers pointing down, add a brown trunk and fingertip ornaments, and write a message inside. Grandparents tend to keep these, and the date on the back is a nice detail to add. Folded cards are also easy to post, which suits families who send them to relatives who live far away. For more gift ideas, see Christmas gifts toddlers can make for grandparents.
Ages: 2 and up with a grown-up doing the printing.
Prep: 10 minutes.
Mess: high.
Drying: 1 hour.
Supplies: folded cardstock, washable paint, a pen for the message, an envelope.
Safety: wash hands right after, and keep the pen out of reach until the paint is done.
- Write the date and your child's age on the back before the card is sealed.
Folded and ready, so there is no cutting.
Paper and Paper Plate Christmas Tree Crafts (Ages 3 to 6)
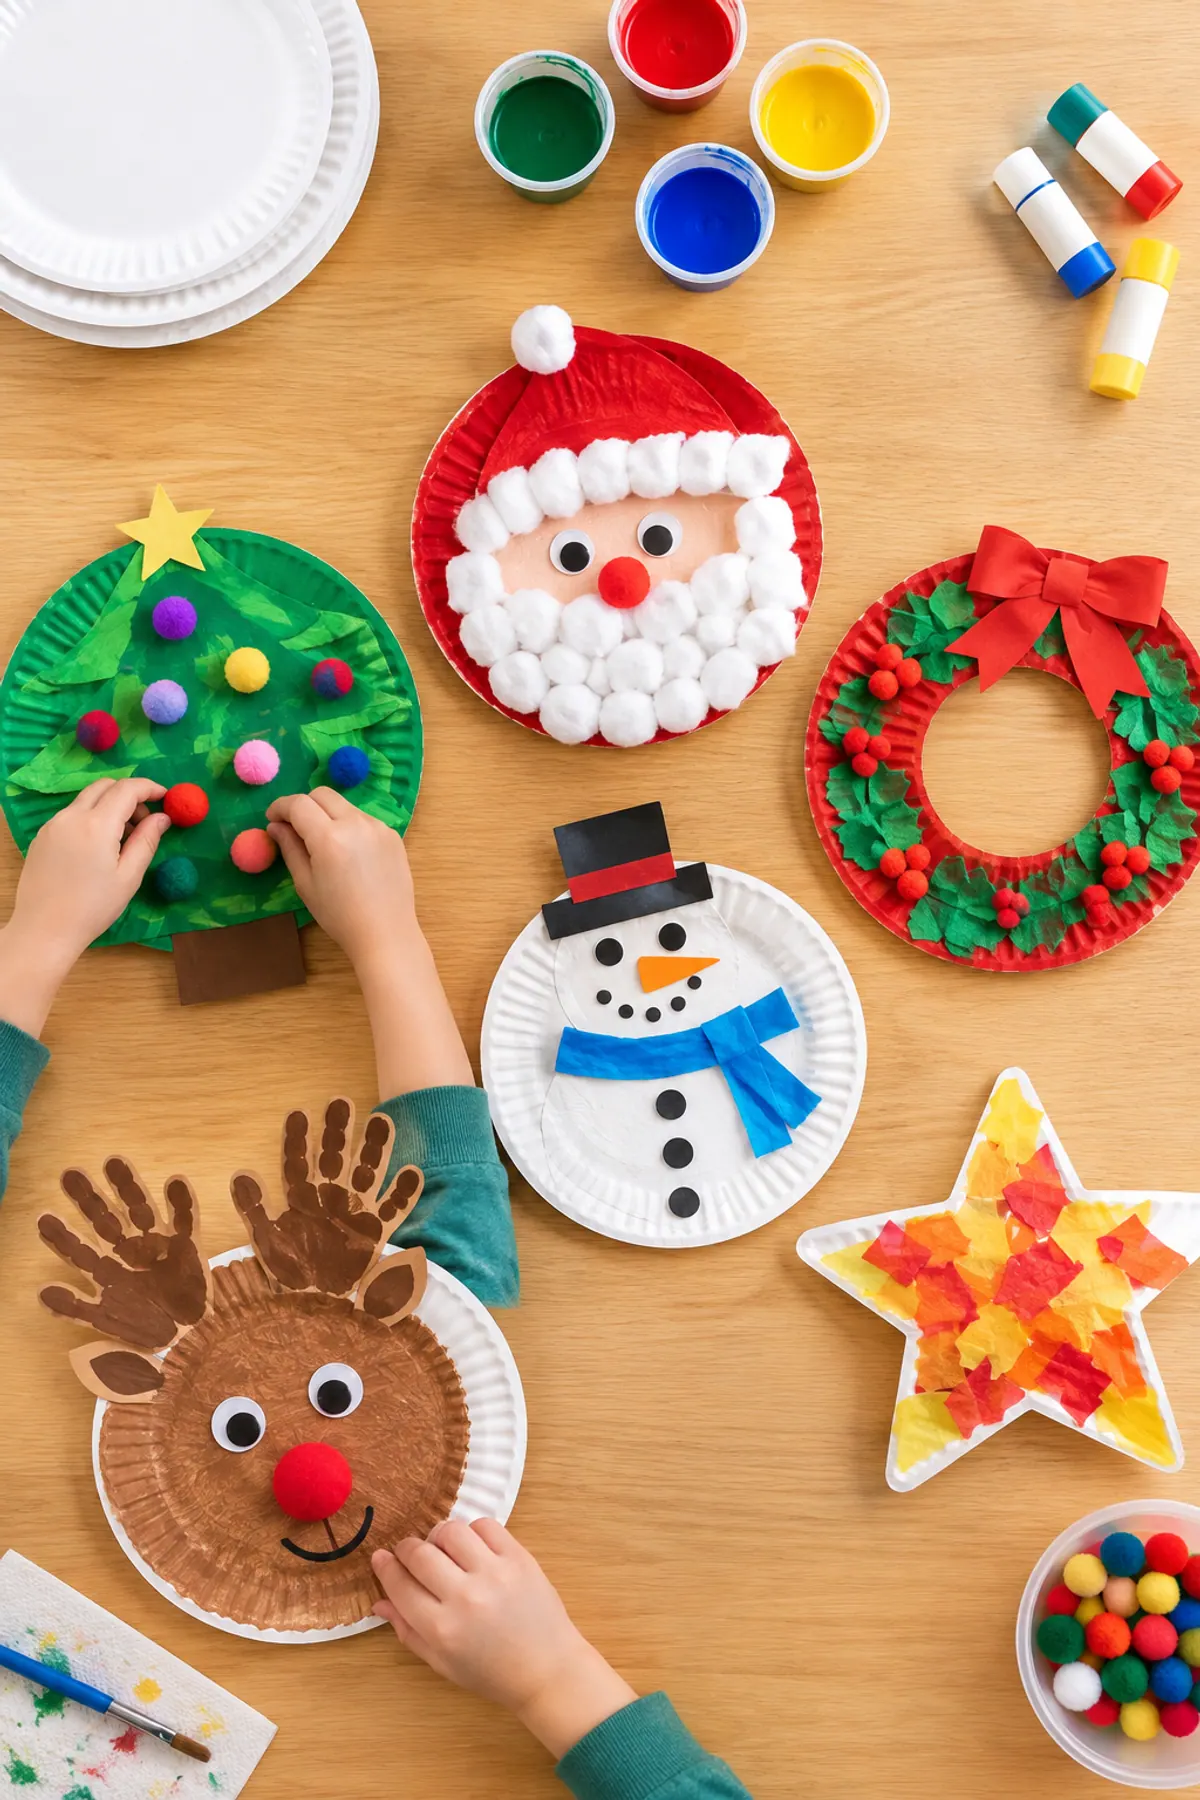
Paper trees suit ages 3 to 6 and cost very little. A paper plate is stiffer than a sheet of paper, so it holds paint, glue and torn scraps without bending. For more plate ideas, see our paper plate Christmas crafts by age.
9Torn paper plate tree
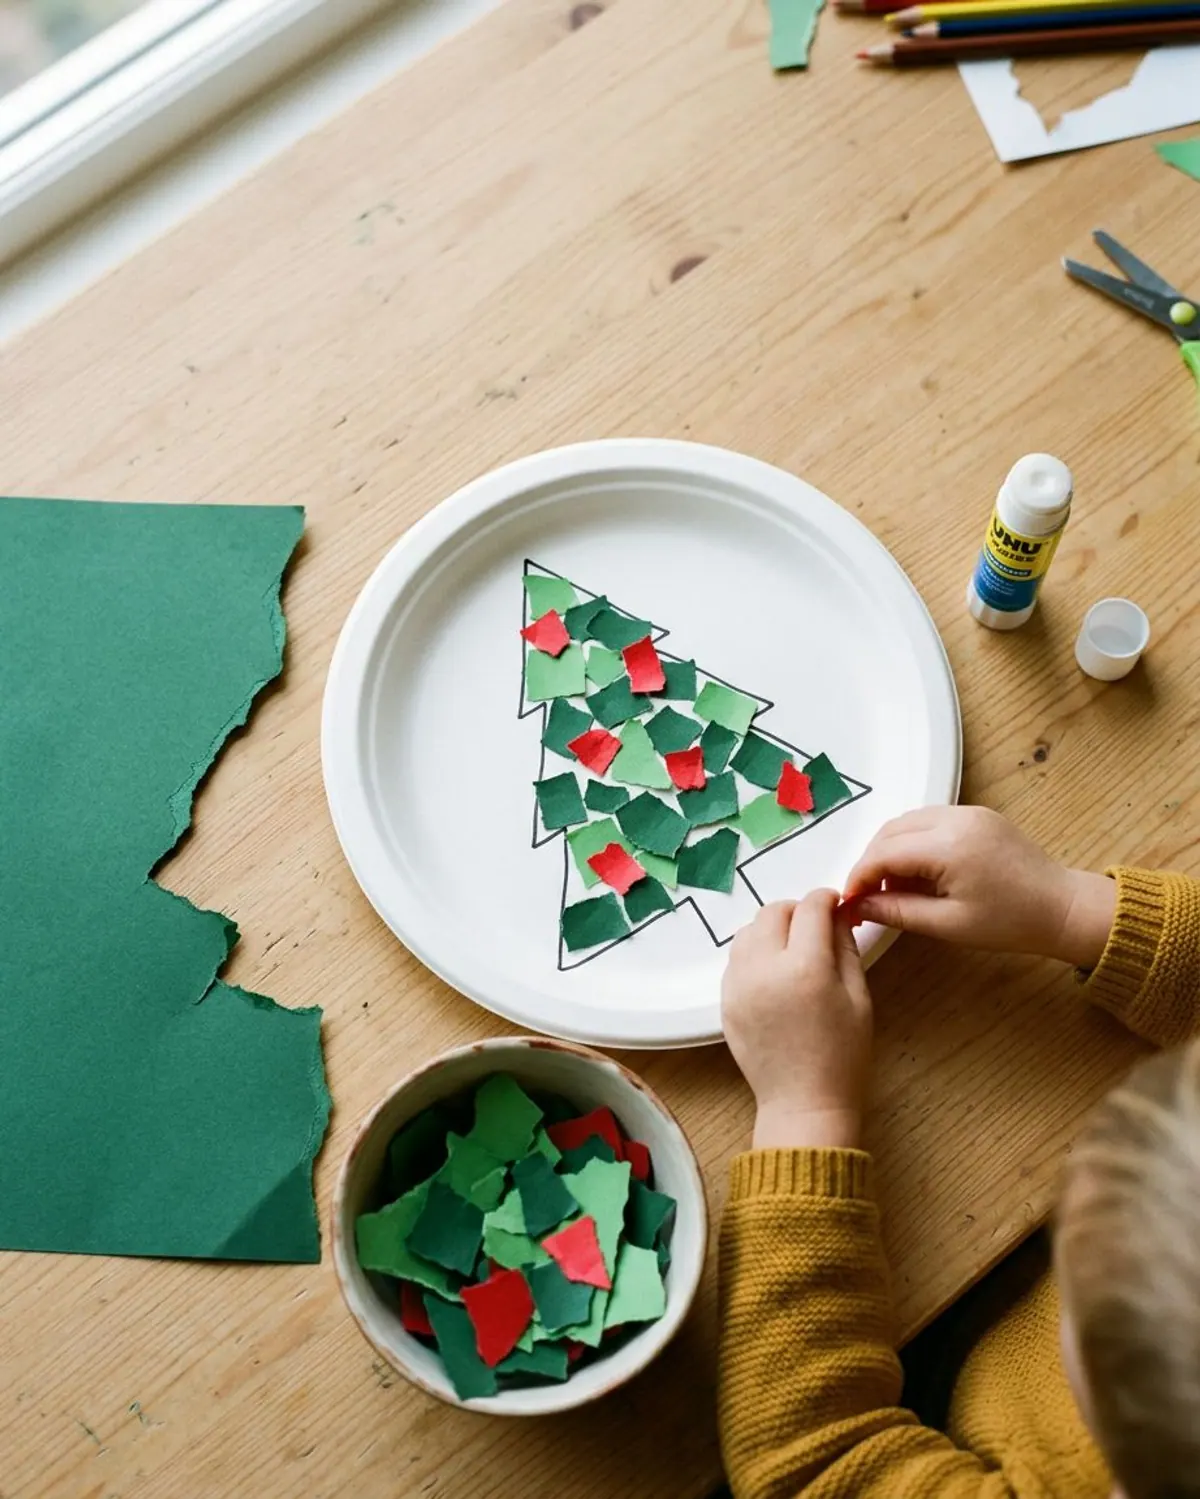
Draw a tree outline on a white paper plate with a marker. Your child tears green and red paper scraps and glues them inside the outline with a glue stick. Tearing is slower than cutting but needs no scissors, and the ragged edges give the tree a furry look. It is also a quiet craft, which helps on days when you need ten calm minutes before a meal.
Ages: 2 and up.
Prep: 5 minutes.
Mess: low.
Drying: none.
Supplies: a paper plate, green and red construction paper, a glue stick, a marker.
Safety: keep scraps in a bowl so none go in a mouth.
- Tear a few starter strips so the paper has a first rip.
Uncoated plates take glue and paint on the first coat.
10Paper plate cone tree
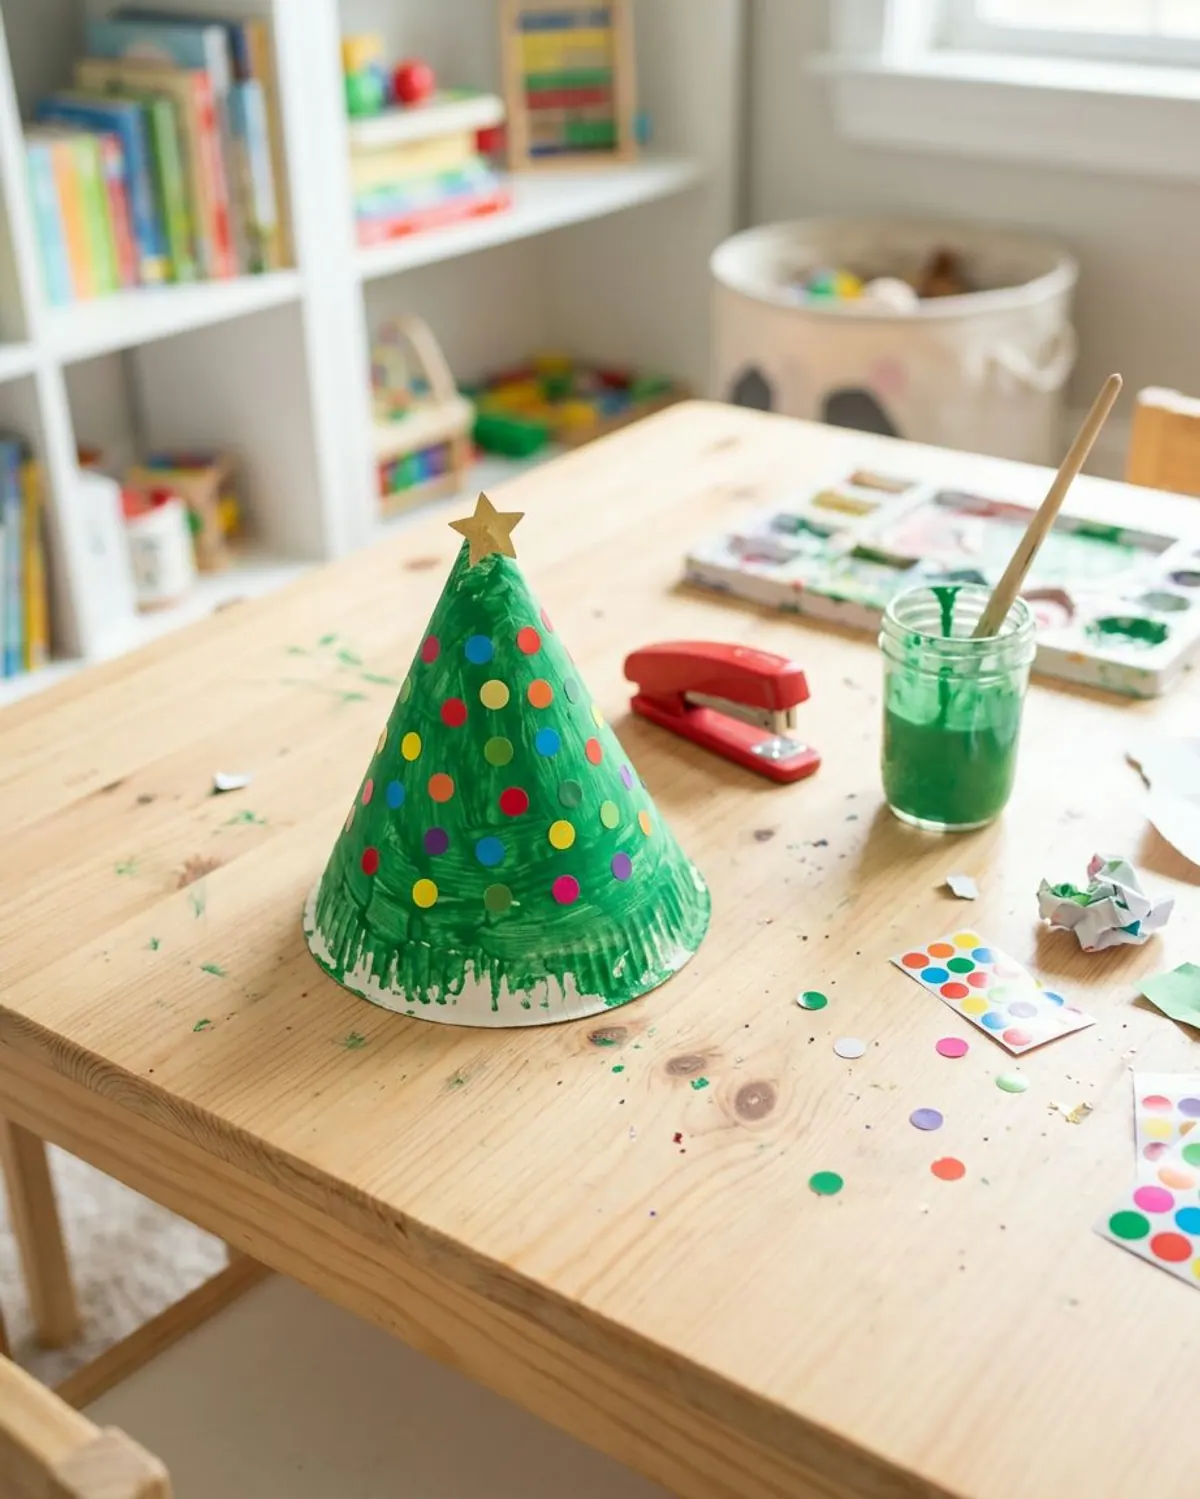
A grown-up cuts a paper plate from the edge to the center, overlaps the cut edges into a cone and staples or tapes it shut. Your child paints the cone green and sticks on dot stickers for ornaments. Add a star sticker to the point, then stand the cone on the table. Because the cone stands up, the tree can sit on a shelf or a mantel instead of being taped to a fridge.
Ages: 4 and up; 3 with a grown-up cutting and stapling.
Prep: 10 minutes.
Mess: medium.
Drying: 1 hour.
Supplies: a paper plate, washable green paint, dot stickers, a stapler or tape.
Safety: an adult handles the stapler and cutting, and the stickers are for kids past the mouthing stage.
- Paint the plate flat before rolling, so the paint reaches the folds.
Easy to peel for small fingers and good for ornaments.
11Paper strip tree
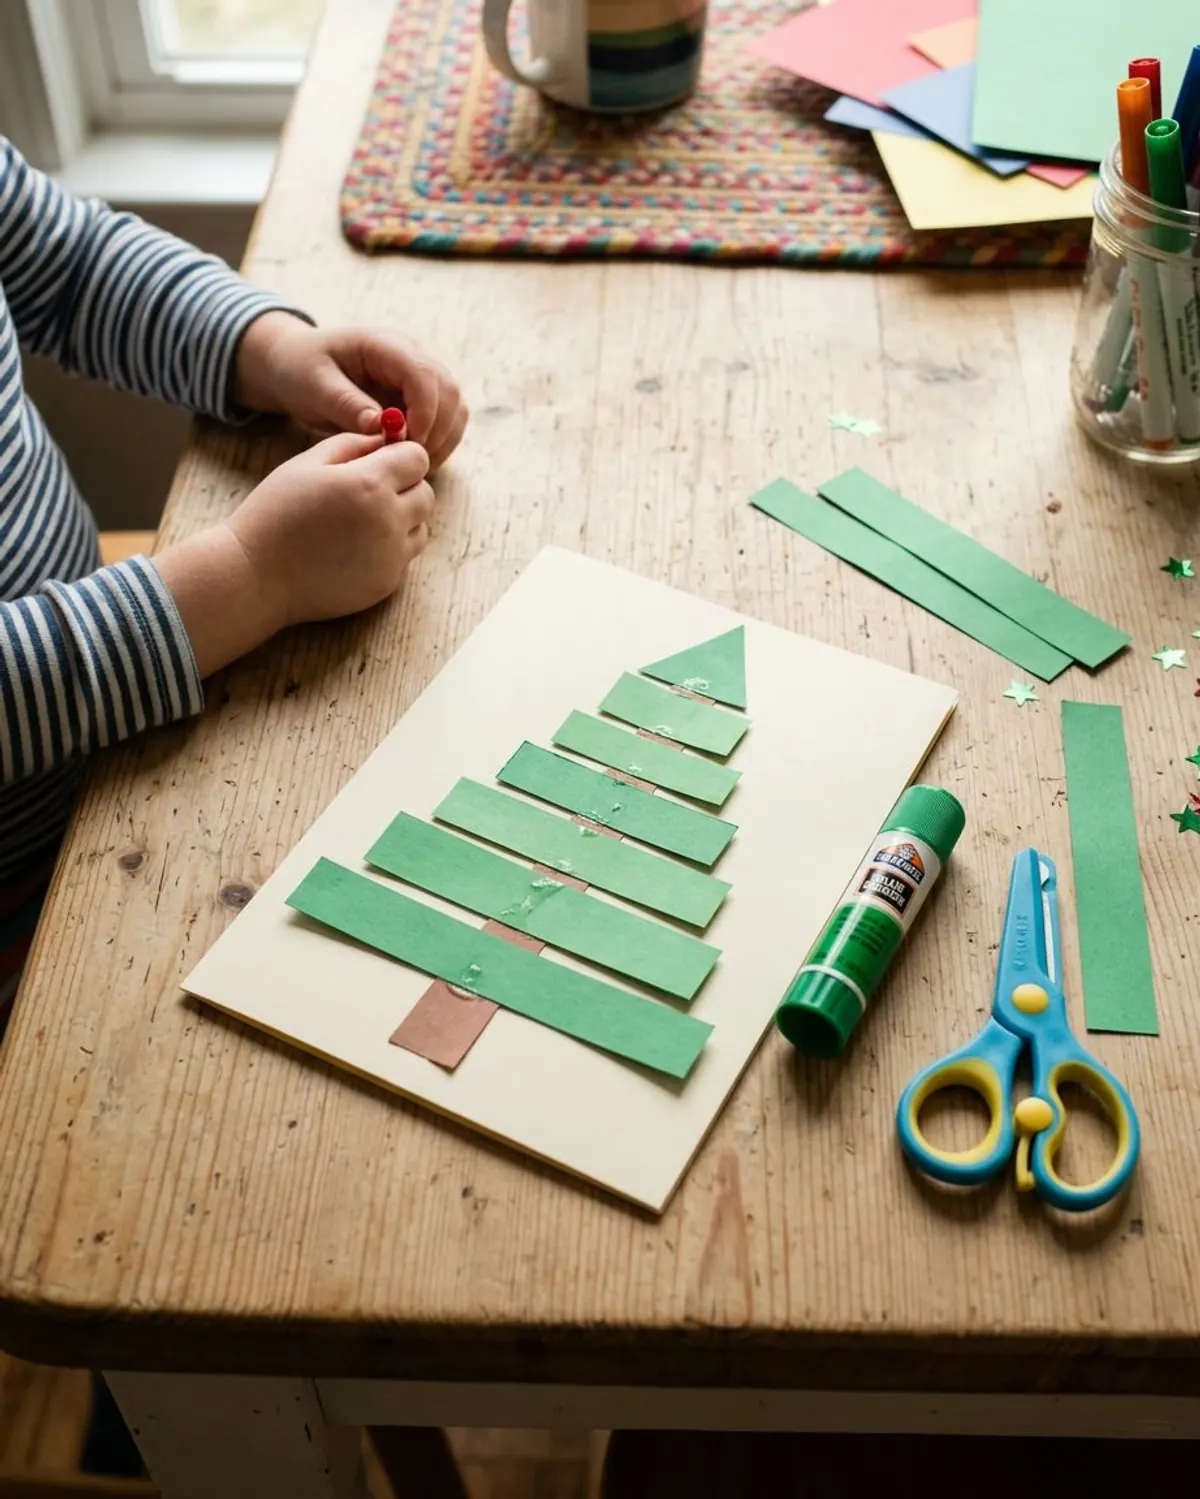
Cut green strips in six lengths, from short to long. Your child glues the shortest at the top and the longest at the bottom on a sheet of paper, with a brown strip for the trunk. The pattern of short to long makes the tree shape without a drawn outline. It also gives a child a gentle way to practice ordering things from small to large, and you can mix red and green strips for a brighter tree.
Ages: 3 to 5.
Prep: 10 minutes.
Mess: low.
Drying: none.
Supplies: green and brown paper, a glue stick, child-safety scissors.
Safety: adult cuts the strips, or lets older kids use rounded-tip safety scissors with supervision.
- Number the strips lightly on the back to make the order a game.
12Cupcake liner tree
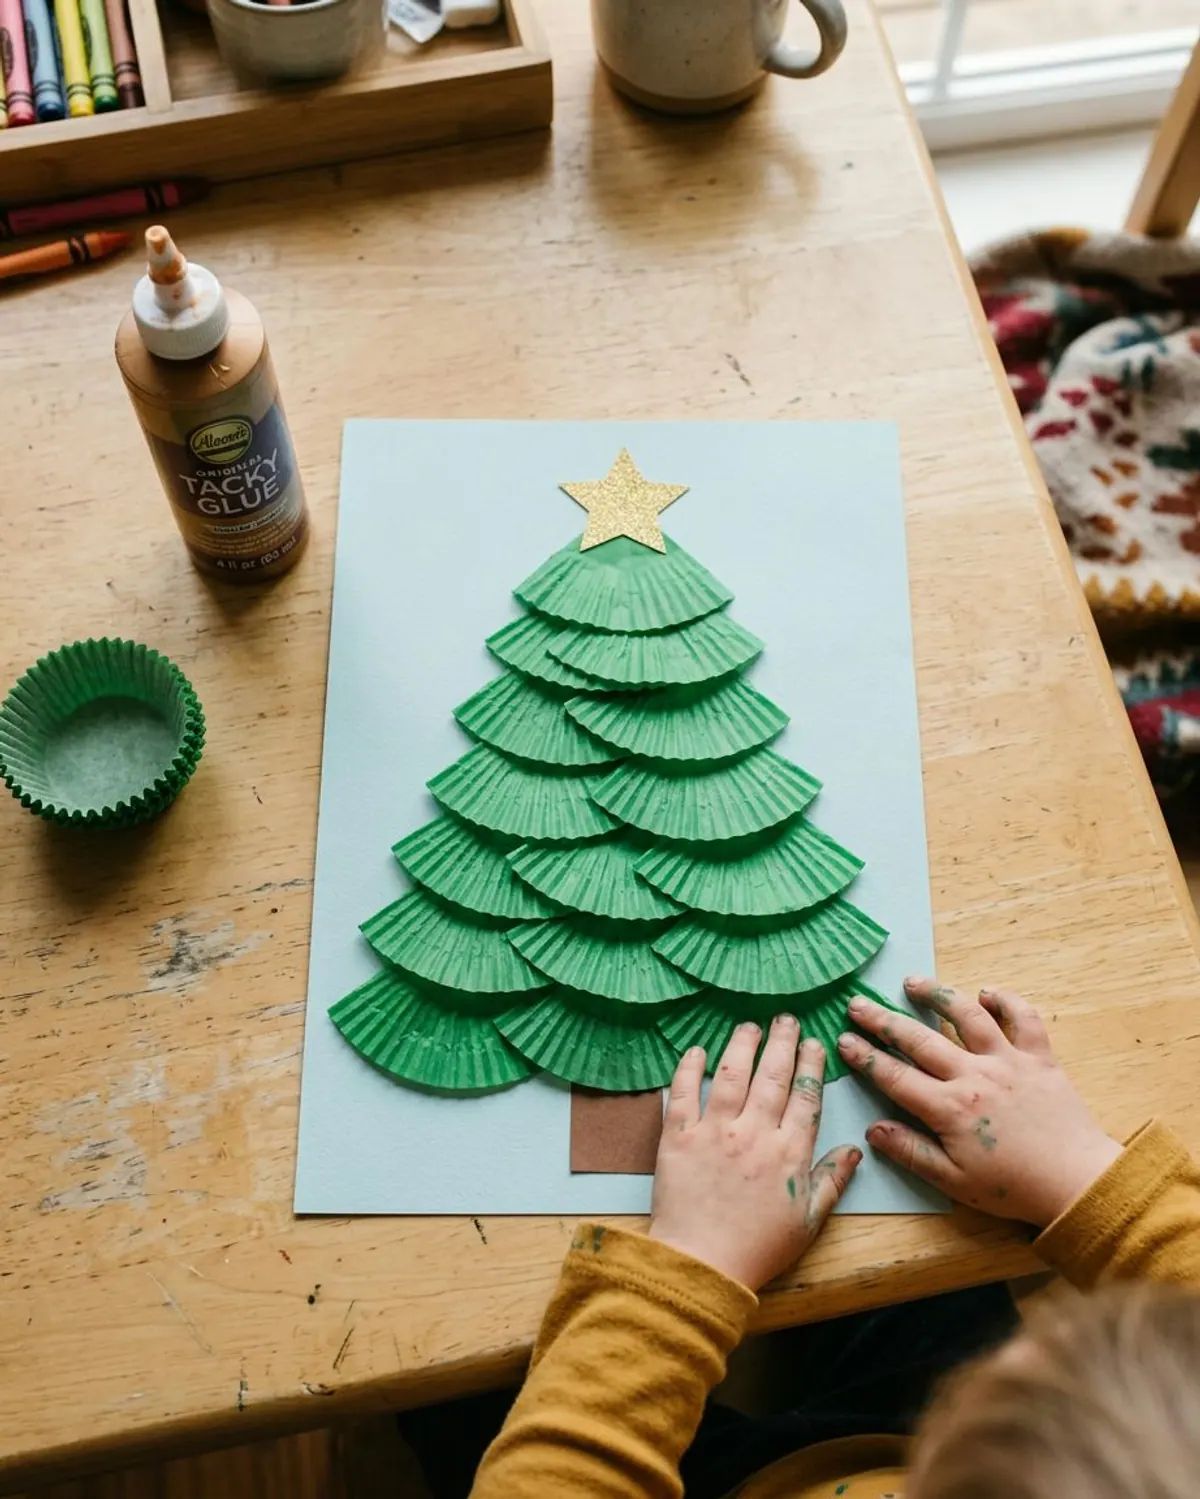
Press cupcake liners flat, then glue them in overlapping rows to build a tree from the bottom up. The ridged edges look like branches, and the colors can be green, red or striped. A strip of brown paper makes the trunk and a gold star finishes it. Liners come in many colors, so you can mix greens or add a patterned row, and a set of them makes a whole forest for a classroom wall.
Ages: 3 and up.
Prep: 5 minutes.
Mess: low.
Drying: 30 minutes with tacky glue.
Supplies: cupcake liners, white glue or a glue stick, a sheet of paper, a star.
Safety: cupcake liners are paper, but small scraps can end up in mouths. Clean up as you go.
- Use tacky glue for liners. A glue stick will not hold them.
Cheap, flat and plentiful for a whole classroom of trees.
13Coffee filter tree
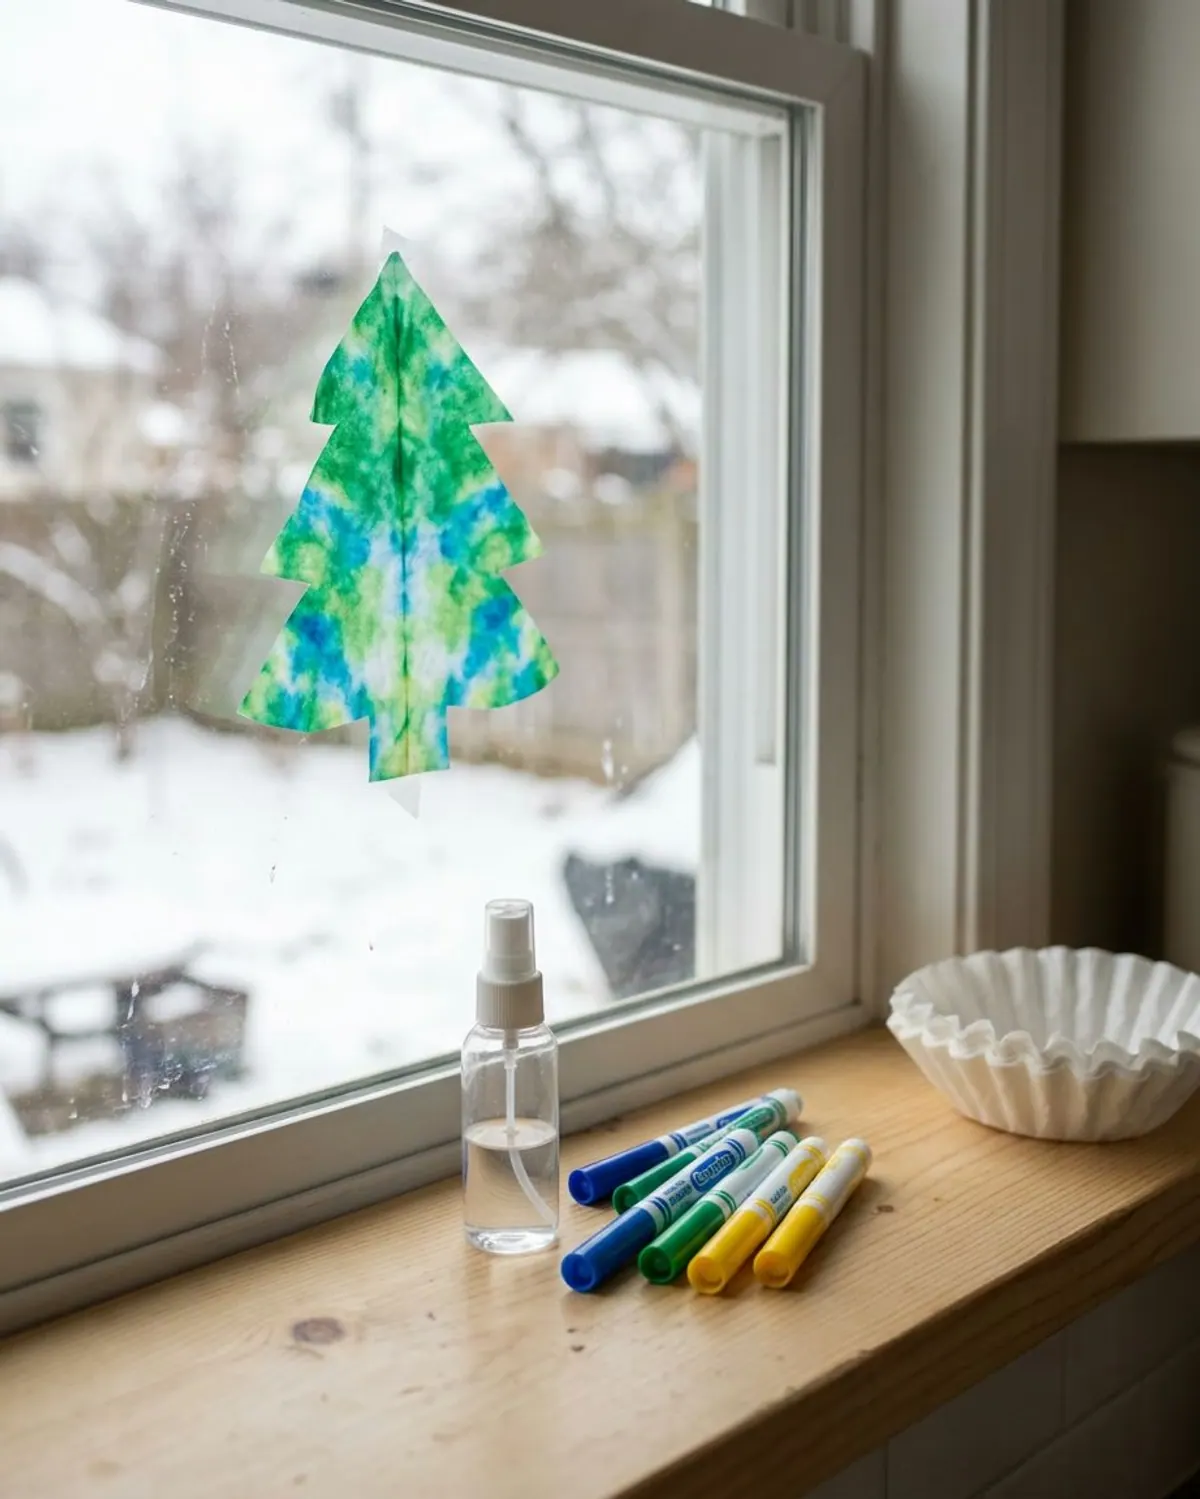
Color white coffee filters with washable markers, then mist them with water from a spray bottle so the colors bleed into one another. Let them dry, flatten them and cut a tree shape. The filters turn out soft and tie-dyed, and look lovely taped to a window. Once dry they are paper thin, so light shows through the colors, and a row of different trees makes a stained glass effect on a window.
Ages: 3 and up.
Prep: 10 minutes.
Mess: medium.
Drying: 2 hours.
Supplies: coffee filters, washable markers, a spray bottle, scissors.
Safety: an adult sprays and cuts, and keeps the spray bottle away from faces.
- Mist lightly first. A soaked filter tears when it dries.
A big pack covers a full classroom of crafts.
Pinecone, Wood and Nature Christmas Tree Crafts (Ages 3 to 6)
Nature and wood trees last longer than paper ones, which makes them good ornaments and gifts. They also dry slower and use stickier glue, so plan on a longer wait and a grown-up for the glue. For simple preschool crafts to pair with these, see preschool Christmas crafts.
14Painted pinecone tree
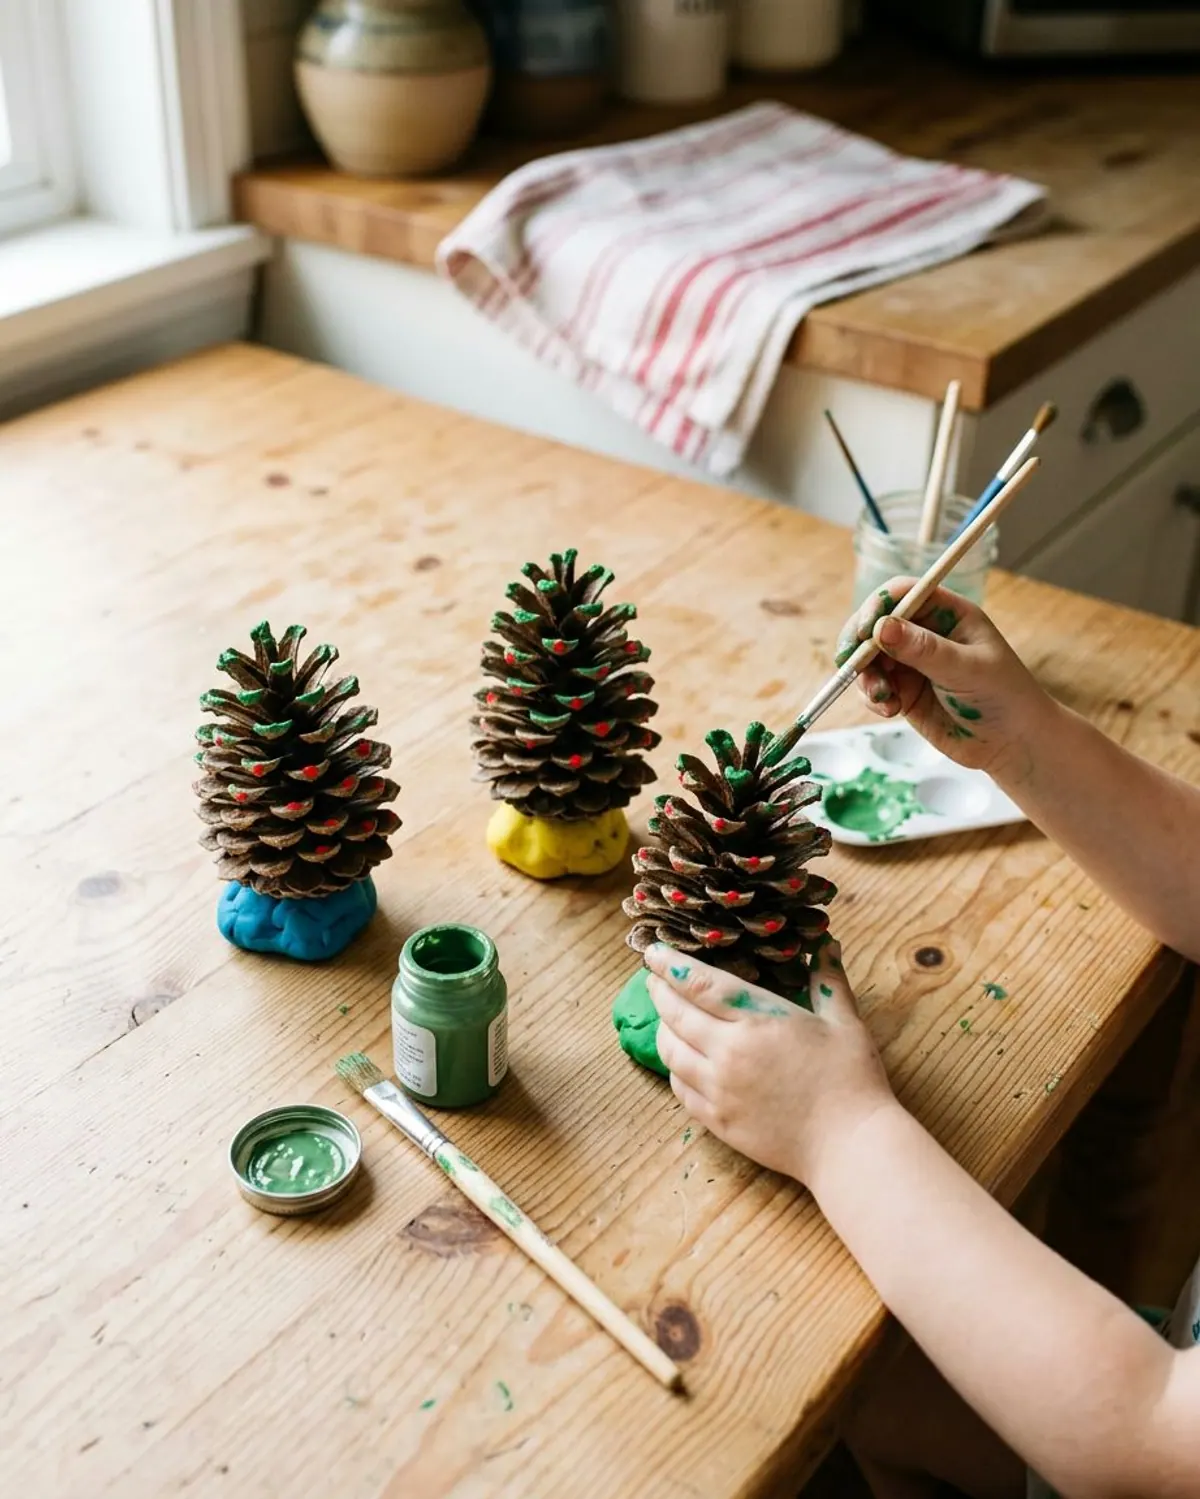
Collect pinecones on a walk and shake them out. Let them dry indoors for a day. Your child paints the tips of the scales green with a stubby brush, then dabs on dot stickers or tiny dabs of white paint for snow. Stand each pinecone in a lump of playdough or on a small wood base. Painting only the tips keeps the natural brown underneath, so the tree looks like a real evergreen with very little paint.
Ages: 3 and up.
Prep: 10 minutes plus drying the cones.
Mess: medium.
Drying: 1 hour.
Supplies: pinecones, washable paint, a stubby brush, playdough for a stand.
Safety: pinecones are scratchy and not food. Wash hands after handling them, and skip glitter and sequins for kids who mouth things.
- Use a mini muffin tin to hold the cones while they dry.
A bag of pinecones if your yard has none.
15Craft stick tree
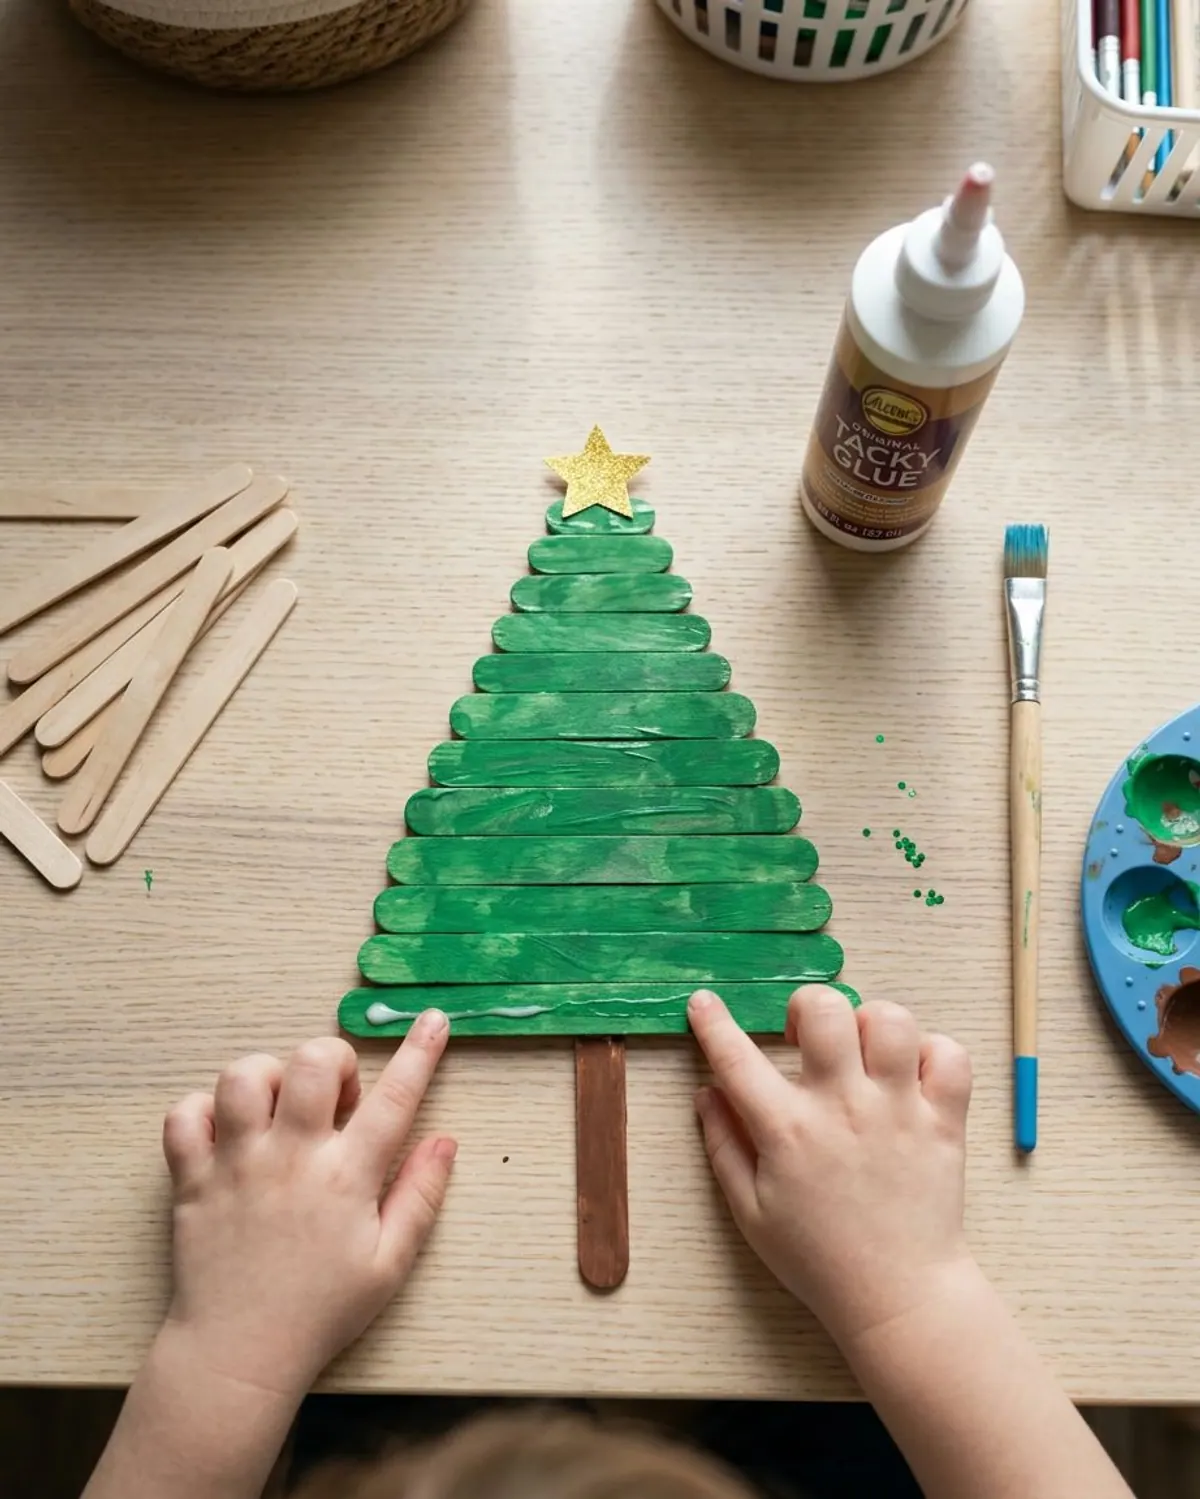
Glue craft sticks in the shape of a tree: a stack of sticks laid across in decreasing lengths, with one painted brown for the trunk. Taming Little Monsters tags this craft 3 to 5 and 5+, says young children need help cutting and uses hot glue (source). We swap hot glue for tacky glue and plan on a long set time. Painted trunks and bright stars make the sticks look like a tree rather than a pile of sticks, and the finished piece is light enough to hang.
Ages: 4 and up; 3 with a grown-up gluing.
Prep: 10 minutes.
Mess: medium.
Drying: 1 hour to hold, overnight to fully set.
Supplies: craft sticks, tacky glue, green and brown paint, a star sticker.
Safety: skip hot glue. An adult uses it only if needed, away from kids.
- Paint the sticks first, then glue. Wet glue under wet paint slips.
Jumbo sticks are sturdier and easier for little hands.
16Painted wooden tree cutout
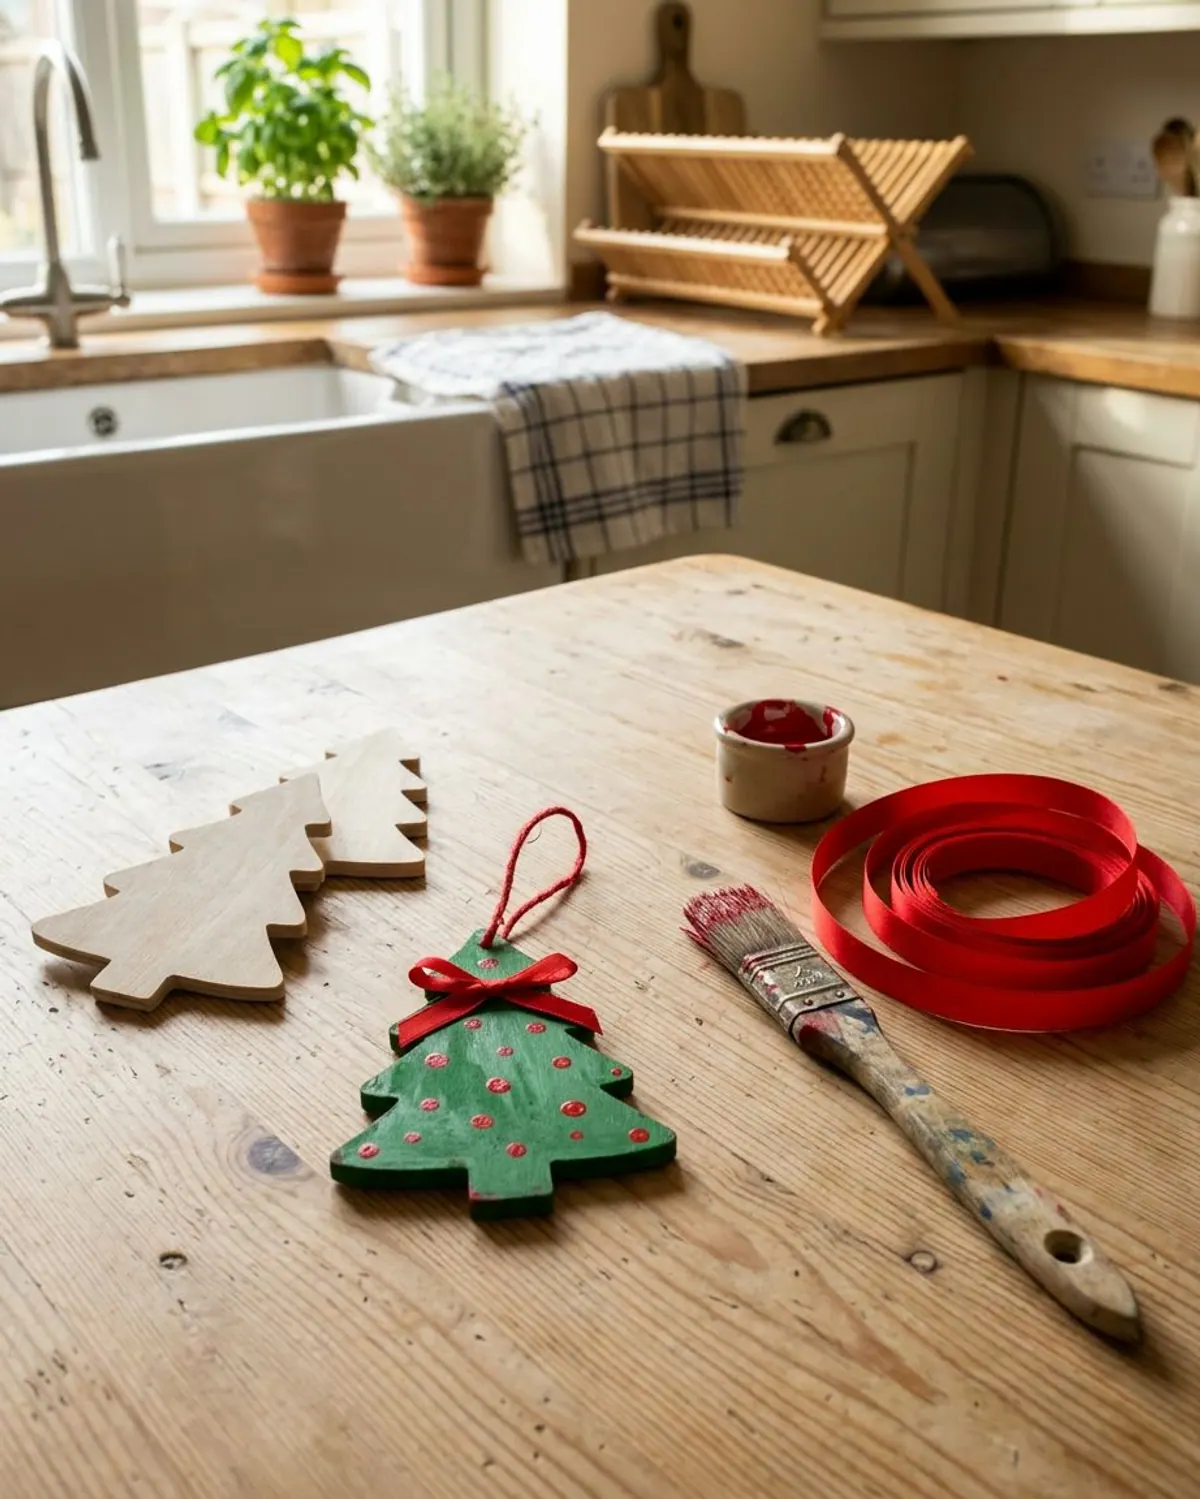
Buy small unfinished wooden tree shapes and let your child paint them green with a thick brush. Add a dot of white or red paint for ornaments. Thread a ribbon through the hole, and you have an ornament that can go on the tree every year. Wooden shapes are sturdy, so they survive being packed away and unpacked, and a child can add the year on the back with a marker.
Ages: 3 and up.
Prep: 5 minutes.
Mess: medium.
Drying: 1 hour.
Supplies: unfinished wooden tree shapes, washable paint, ribbon.
Safety: wooden pieces are smooth but not for chewing. Check for splinters before painting.
- Sand the edges lightly before painting if they feel rough.
A pack of paint-ready shapes, enough for gifts.
17Twig tree on cardboard
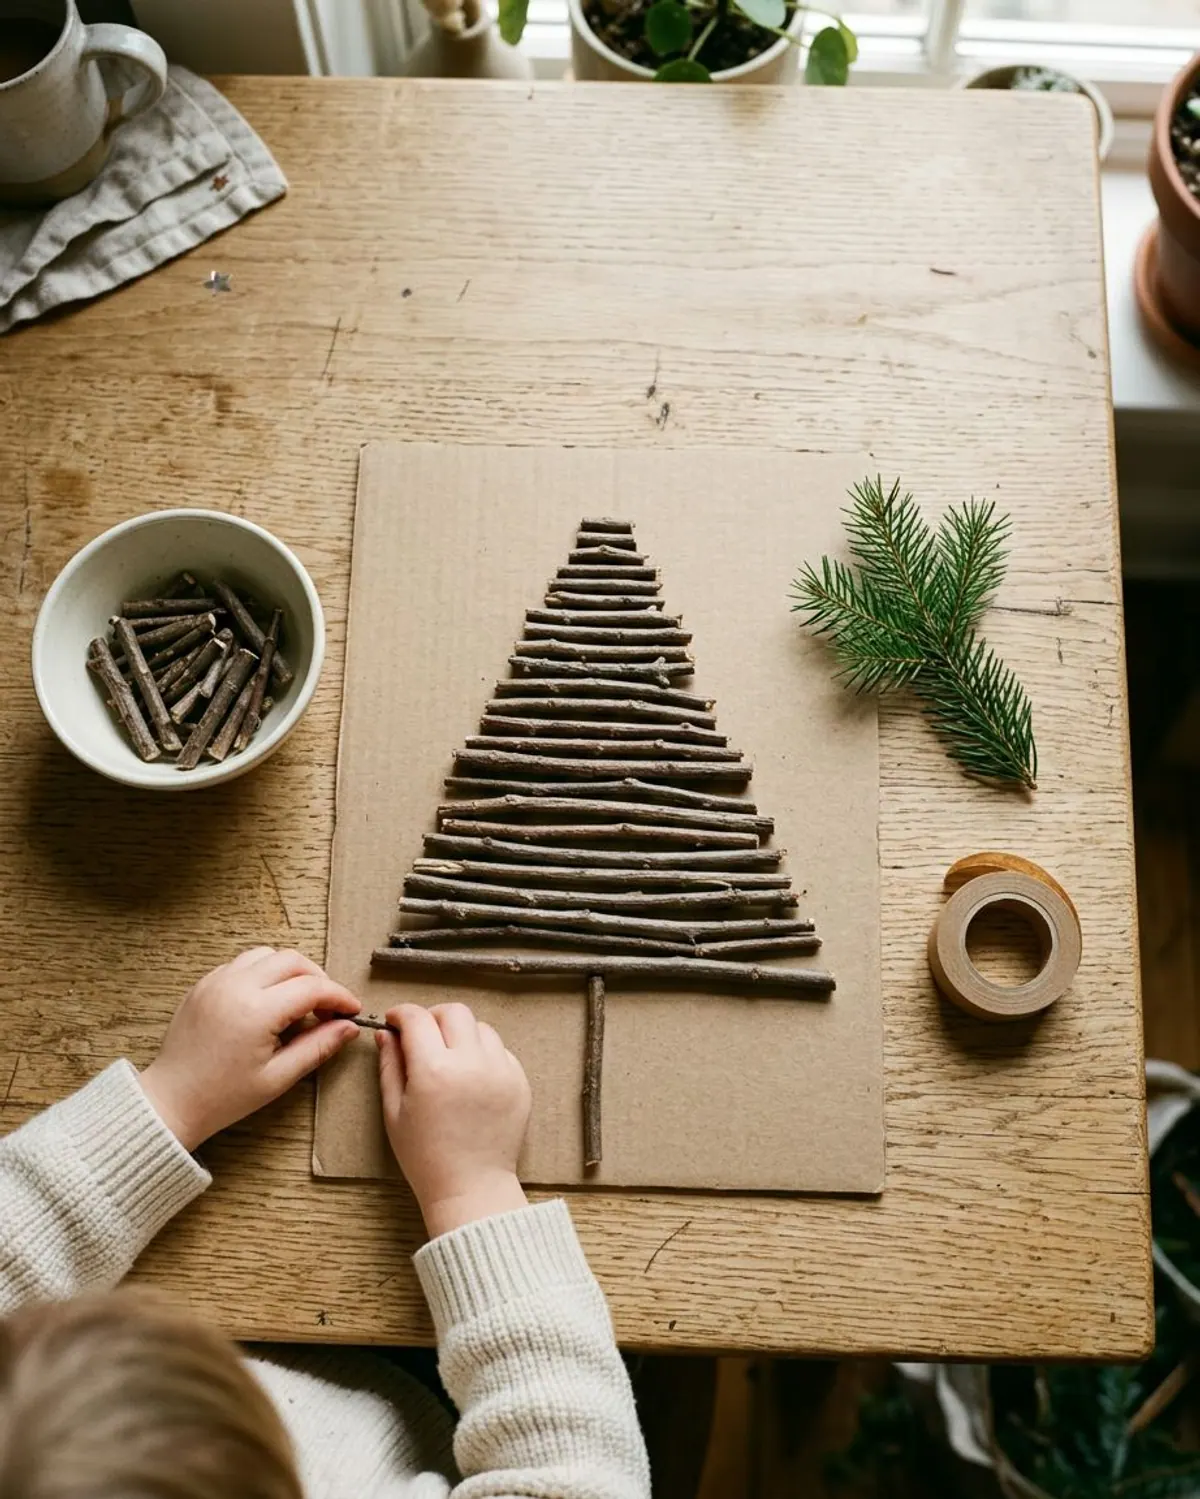
Take a short walk and gather straight twigs. Back inside, tape or glue them in a tree shape on a piece of cardboard: a long trunk and shorter branches angled up. It looks like a real winter tree, and the walk is part of the fun. Let your child pick the twigs, since choosing the best ones is half the activity, and a few green pine needles glued on turn it into a winter forest.
Ages: 2 and up with a grown-up gluing.
Prep: 10 minutes plus the walk.
Mess: low.
Drying: 30 minutes with tacky glue.
Supplies: twigs, cardboard, strong tape or tacky glue.
Safety: twigs have sharp ends, so an adult snaps them to length and checks for splinters.
- Snap twigs to the same length as a ruler so the branches line up.
18Evergreen sprig print tree
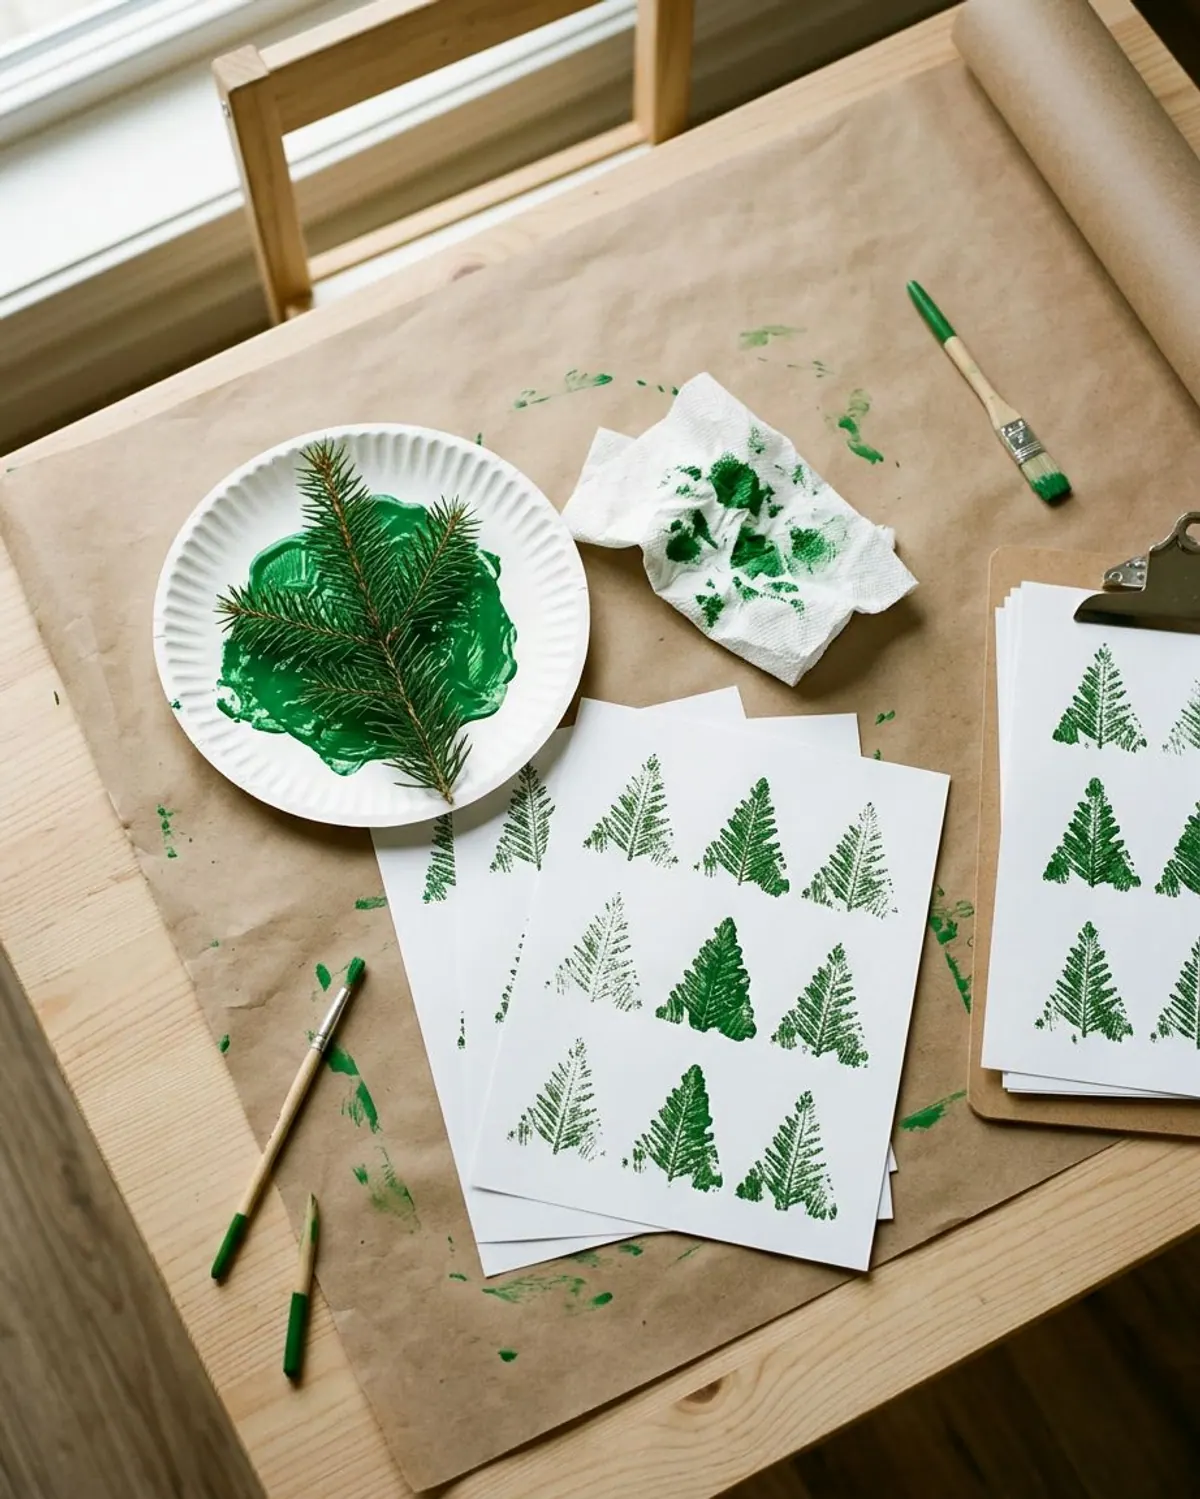
Cut a small evergreen sprig from a real tree and brush paint on the needles. Press it on paper, then lift. The needles make a feathery print, and a few prints side by side fill a pretty forest scene. Real needles make a print that no stamp can match, and the smell of fresh evergreen adds to the Christmas feeling in the room. Pat the branch on a towel to keep it from soaking.
Ages: 3 and up.
Prep: 5 minutes.
Mess: medium.
Drying: 1 hour.
Supplies: an evergreen sprig, washable paint, white paper.
Safety: wash hands after handling evergreens, and never let kids chew the needles.
- Do the prints on newspaper first to practice pressing.
What Most Tree Craft Pages Skip: Full Supply Lists, Drying Times and Glue Safety
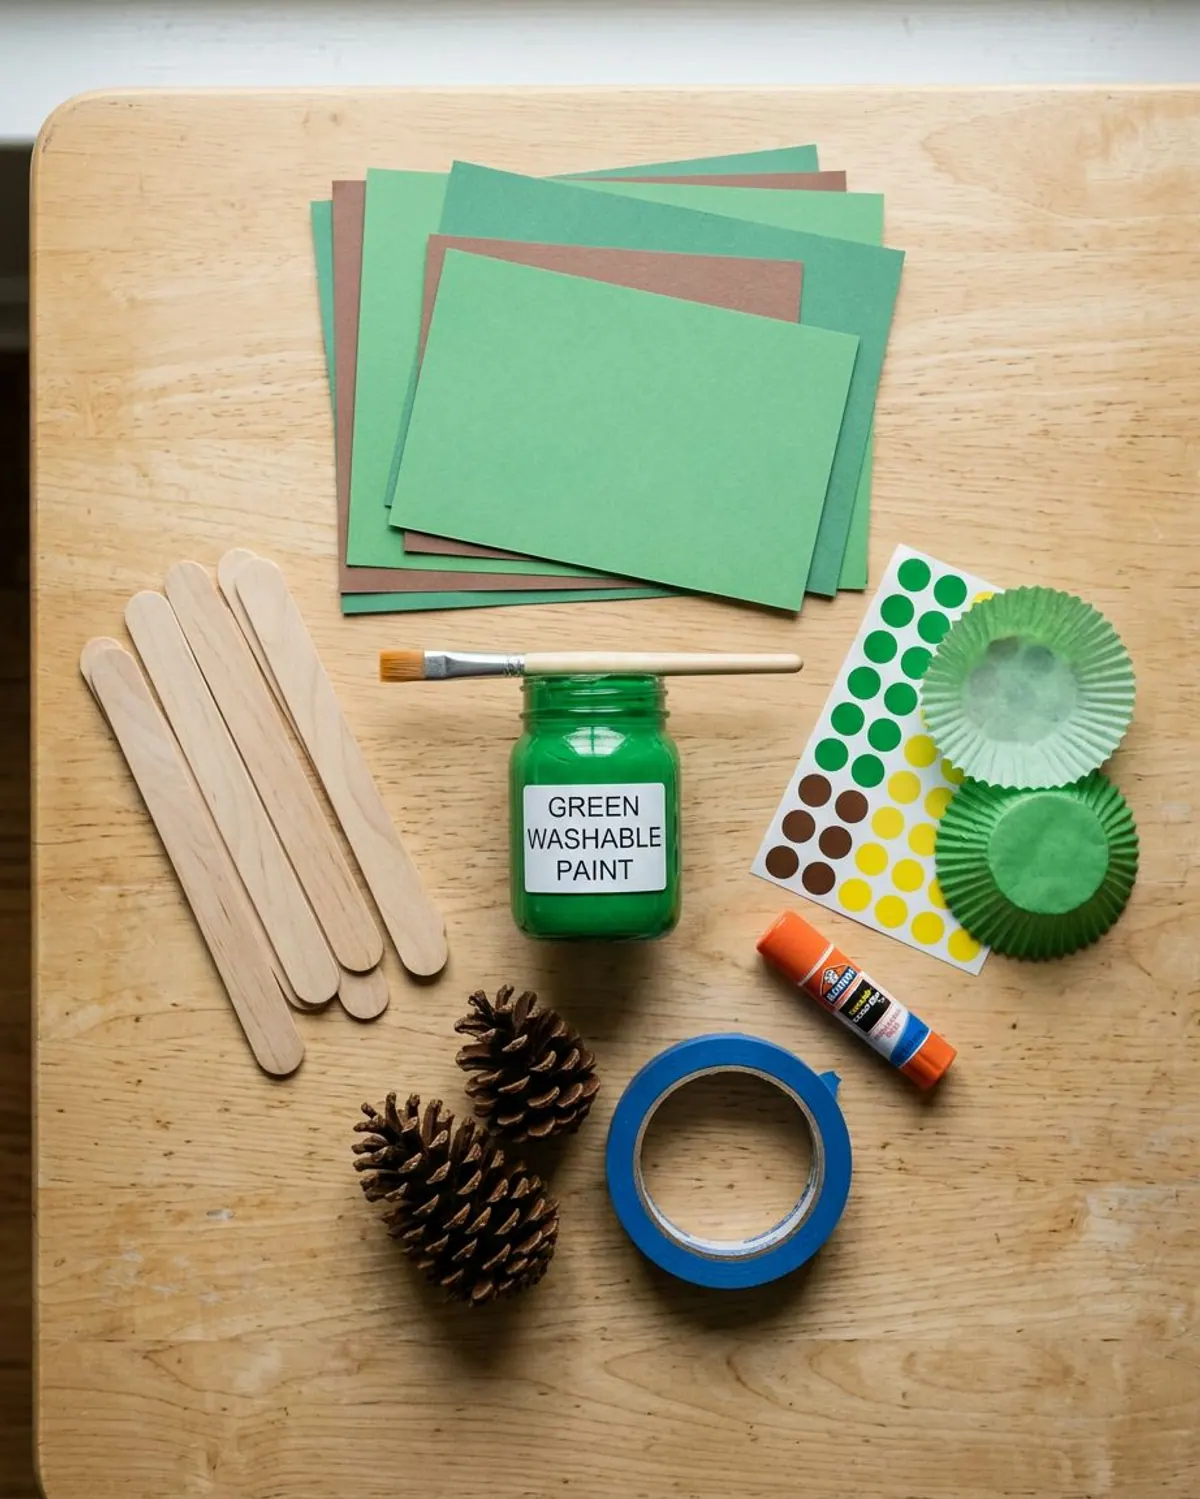
Most Christmas tree craft pages show a pretty photo and a short list. Several leave out the thing you only notice when the paint is wet: the brown paint for the trunk, the star sticker, or the cutting tool the steps assume. Easy Peasy and Fun's handprint tree lists green cardstock, a jumbo craft stick painted brown, yarn and a yellow paper star (source), which is a good list to compare against.
Taming Little Monsters is clearer on age, tagging its tree 3 to 5 and 5+, but it uses hot glue and says young children need help cutting (source). We fill those gaps here with three habits: list every supply, say how long to wait and name the glue.
| Craft type | Planning time | What to do while you wait |
|---|---|---|
| Glue stick and contact paper | None | Hang it up right away |
| Dot markers | A few minutes | Add a name and the year |
| Thin washable paint on paper or plate | About 1 hour | Wash brushes, set the page flat |
| Thick finger paint | Overnight | Keep it flat and out of reach |
| Tacky glue on craft sticks or liners | 30 minutes to hold, overnight to set | Prop it up, do not hang it |
These are planning times, not lab tests. Press a corner with a fingertip to check. A craft that feels cool or tacky is not dry yet.
Before you start any tree craft
What we like
- Tacky glue: no burn risk, safe for kids to hold the bottle
- Tacky glue: dries clear and holds paper, wood and felt
- Tacky glue: cheap and easy to find
Keep in mind
- Hot glue: burns skin and is for adults only
- Hot glue: sets in seconds but is easy to bump
- Tacky glue: needs 30 minutes to hold and overnight to set
Supplies for These Christmas Tree Crafts
You can make most of these trees from one shelf: paper, paint, glue and a few extras. If you want to buy a short list, here are the supplies we reach for first. Each link is a plain search, so compare brands and sizes before you order.
Christmas tree craft supplies
-
Clear contact paper roll
Typically $8 to $12
Sticky tree and wreath without glue.
Check price on Amazon for Clear contact paper roll -
Washable dot markers
Typically $8 to $15
Quick, mess-free dot trees.
Check price on Amazon for Washable dot markers -
Washable finger paint
Typically $8 to $15
Handprint and fingerprint trees.
Check price on Amazon for Washable finger paint -
Uncoated paper plates
Typically $4 to $9
Take paint and glue better than coated plates.
Check price on Amazon for Uncoated paper plates -
Dot stickers
Typically $5 to $9
Easy ornaments for plate and pinecone trees.
Check price on Amazon for Dot stickers -
Craft sticks
Typically $5 to $10
Craft stick trees and trunks.
Check price on Amazon for Craft sticks -
Unfinished wooden tree cutouts
Typically $8 to $14
Paint-ready ornaments.
Check price on Amazon for Unfinished wooden tree cutouts -
Cupcake liners
Typically $3 to $7
Overlapping liner trees.
Check price on Amazon for Cupcake liners -
Washable ink pads
Typically $7 to $12
Neat fingerprint ornaments.
Check price on Amazon for Washable ink pads
Want the rest of the December plan? The Christmas Activity Pack gives you 24 days of printable activities, and our Christmas crafts for toddlers by age post covers more crafts for ages 1 to 3. For older kids, try Christmas crafts for ages 2 to 8.
Frequently asked questions
What is an easy Christmas tree craft for toddlers?
A contact paper tree is the easiest: tape a clear tree shape sticky side out on a low window and let your toddler press on big tissue squares. A dot marker tree and a painted handprint tree are close behind. All three use pieces bigger than a toilet paper tube is wide, and none need scissors.
What Christmas tree crafts can a 2 year old do?
A 2 year old can make a dot marker tree, a sponge stamp tree, a tape-resist tree, a torn paper plate tree and a fingerprint ornament tree. Tape the paper down, offer two colors and stay within arm's reach. A grown-up cuts any shapes.
What Christmas crafts can toddlers make as gifts for grandparents?
A handprint tree card is the classic: press a green handprint on folded cardstock, add a trunk and fingertip ornaments, and write a message inside. A painted wooden tree ornament also works for ages 3 and up. More ideas are in our post on toddler Christmas gifts for grandparents.
Is hot glue safe for kids' Christmas crafts?
No. Hot glue burns skin and is for adults only. Use tacky glue for craft sticks, cupcake liners and wood, and plan on 30 minutes to hold and overnight to set. If a craft needs hot glue, an adult should do that step away from the child.
How long does paint take to dry on a paper plate Christmas tree?
Thin washable paint on a paper plate usually dries in about an hour, while thick finger paint can take overnight. Press a corner with a fingertip: if it feels cool or tacky, wait longer. Lay the plate flat on a table, out of reach, until it feels dry.
What can I use instead of pom poms on a toddler's Christmas tree craft?
Use dot stickers, dot marker dots, fingerprint dots or crumpled tissue paper. Pom poms, beads and sequins are choking hazards for children under 3, and standard pom poms fit through a toilet paper tube. Wait until your child has stopped mouthing things before adding them.
Save it for later
Pin this to your Holiday Crafts board so it's there when you need it.
Save to Pinterest